.png)


This is some text inside of a div block.
Easier Time Tracking with Calendar Integrations
If writing down how you’re going to spend your time, then writing down how you spent it seems like a waste of time, you’ll love this feature.
Businesses that perform contract services need an accurate and efficient billing process in order to collect revenue. Using this three-step process in Clockwork will ensure that all billable time is captured and expedite your invoicing.
This example uses two Clockwork attributes to track whether or not the work completed is billable, and the client for whom the work was done.
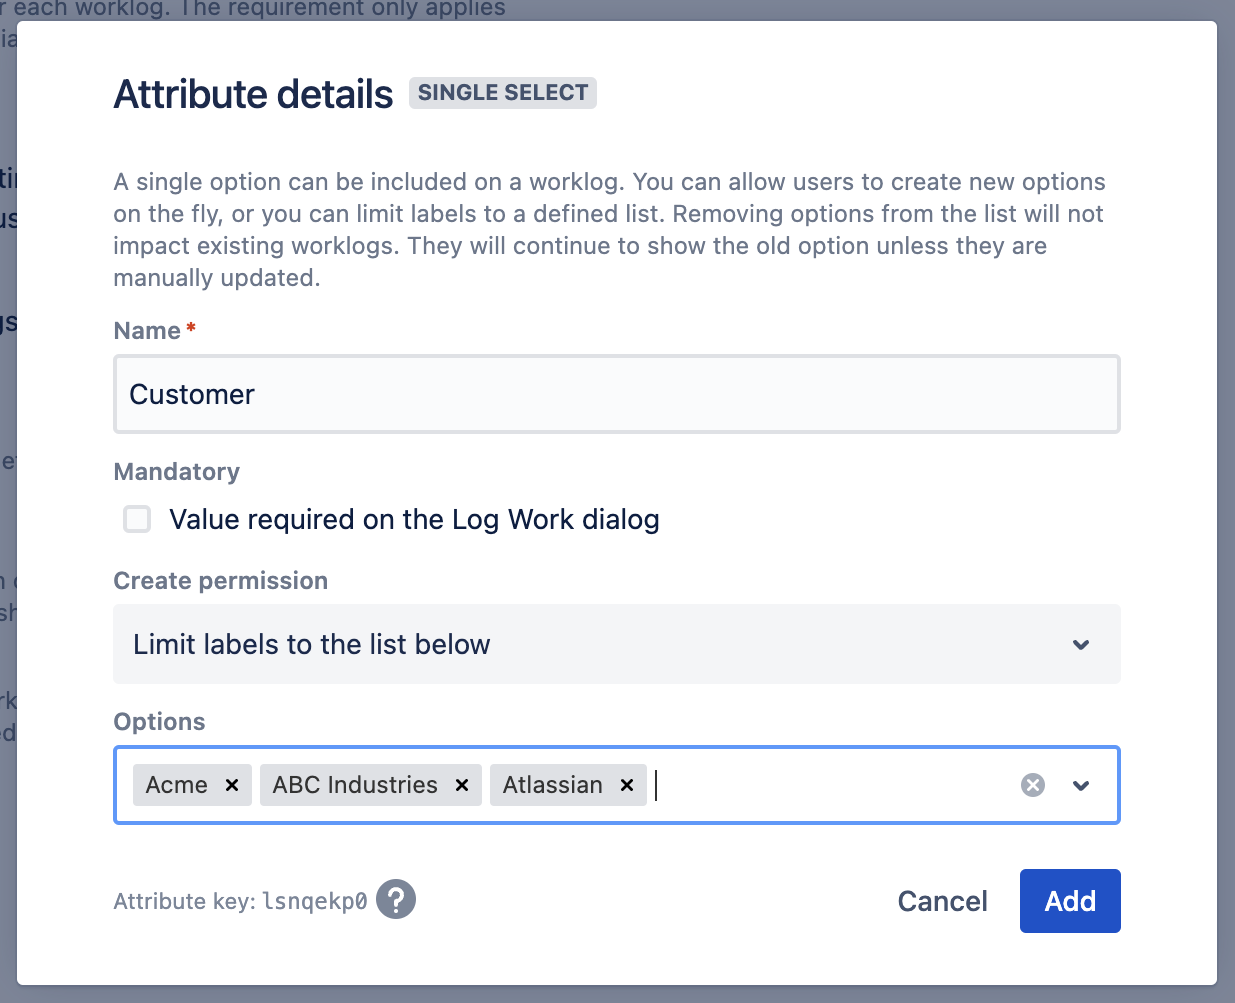
If you don’t need the granular information provided by Clockwork attributes, as an alternative you can create a Jira custom fields for Billable/Non-billable hours:
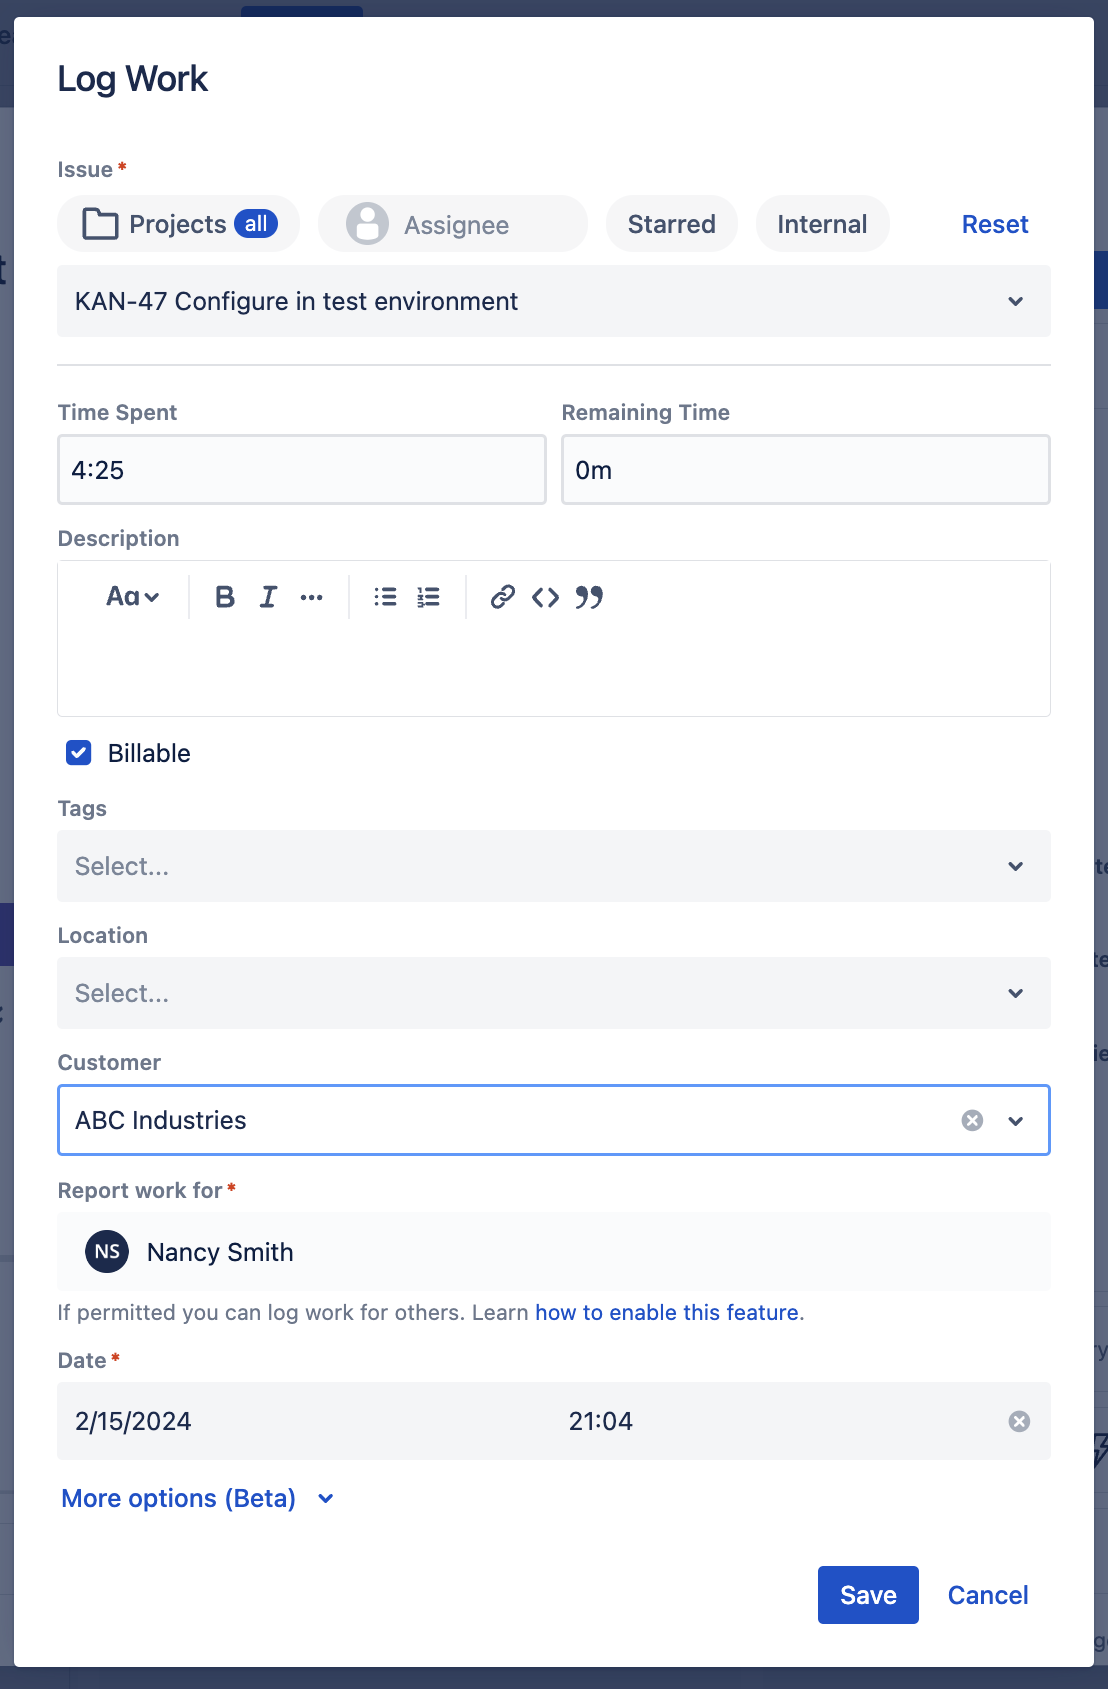
Now when your team tracks their time, they can indicate if the hours were billable, and the name of the customer.
To endure that no changes are made to the worklogs once you produce the invoice, you can lock the billing period.
Navigate to Billing Periods tab in the left nav bar and click Add. Then select the period start and end dates. (Start and end times are optional). Checking the Auto close? checkbox allows you to set a time when it will no longer be possible for users to add, edit or delete worklogs for the Billing Period. This ensures that no changes will be made and that your invoices will be accurate.
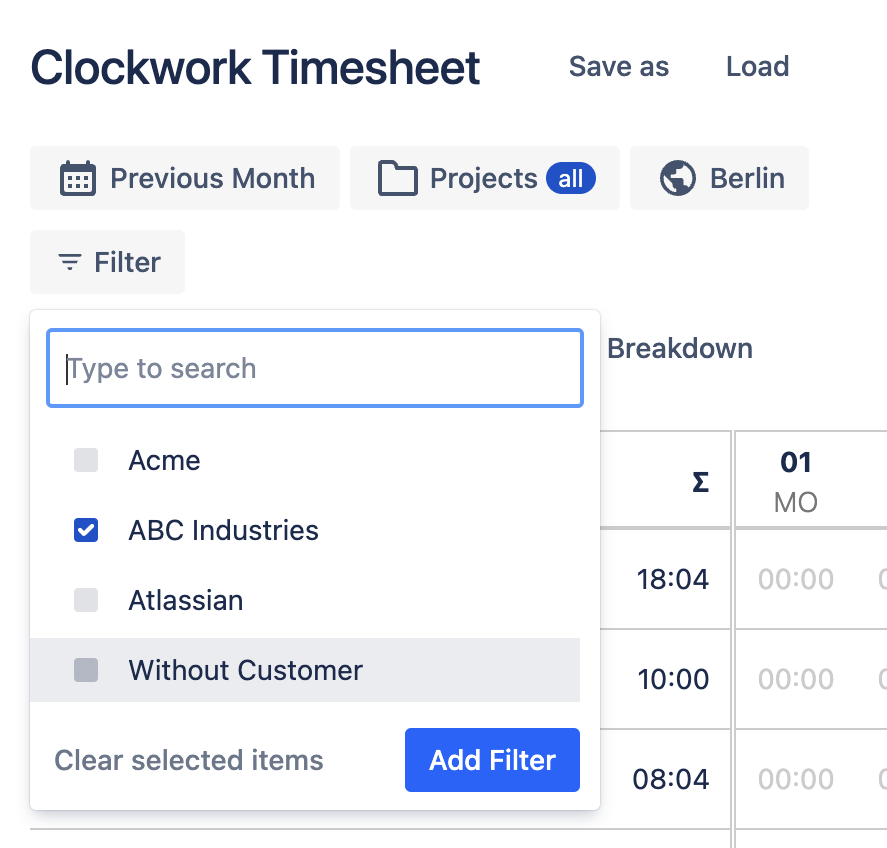
Now you can create your timesheet report using the Billable and Customer attributes (or fields) as filters and/or breakdowns. You can then export the report to an Excel file to be formatted as an invoice.
The three steps of configuring worklog attributes, tracking time in Clockwork and setting up locked billing periods improve ease and accuracy of your billing process.


.jpg)


Join us on Social Media!

.svg)
.png)