Tracking time is part of doing business. Organizations need time tracking data in order to pay their employees, invoice their customers, and accurately plan future projects. However, tracking time takes time – time that most teams would rather spend in other ways. This use case demonstrates how to enable a no-touch time tracking solution in Jira.
Clockwork for Jira | Pro
Clockwork for Jira allows teams to track their time automatically, without requiring any input from the users. This not only increases efficiency, it removes the inaccuracies that occur when teams rely on users to remember to track time on each issue.
Clockwork uses the issue status and the assignee’s working hours to calculate the amount of time spent, and generate Jira worklogs. The time tracking data is then available in Clockwork timesheets and reports – all without any effort from the user.
Implementing No-touch Jira Time Tracking
After installing the Clockwork for Jira app you can set-up automatic time tracking in four simple steps:
1. Enable Clockwork on the Project(s)
Ensure that Clockwork is enabled on all projects where you want to use automatic time tracking. To enable Clockwork on a project, navigate to Jira Settings > Apps > Clockwork configuration and select the Active Projects tab. You can set Clockwork to be enabled on all projects by default, or enable projects individually.

2. Enable Automatic Time Tracking
Clockwork offers three different methods for tracking time:
- Manual: Manually creating a worklog with the amount of time entered by the user
- Clocked: Starting and stopping a timer on the Jira issue
- Automatic: Calculating the time based on the issue status and assignee’s working hours
You can use any combination of these time tracking techniques, allowing users and teams to choose their preferred method. For no-touch time tracking, ensure that one of the options that includes the automatic time tracking is selected.
The time tracking method can be set at the global (Jira Settings > Apps > Clockwork configuration > Time Tracking tab) or at the project (Project Settings > Apps > Clockwork > Time Tracking tab) level. The project settings will override global settings.
The time tracking method can be set at the global (Jira Settings > Apps > Clockwork configuration > Time Tracking tab) or at the project (Project Settings > Apps > Clockwork > Time Tracking tab) level. The project settings will override global settings.
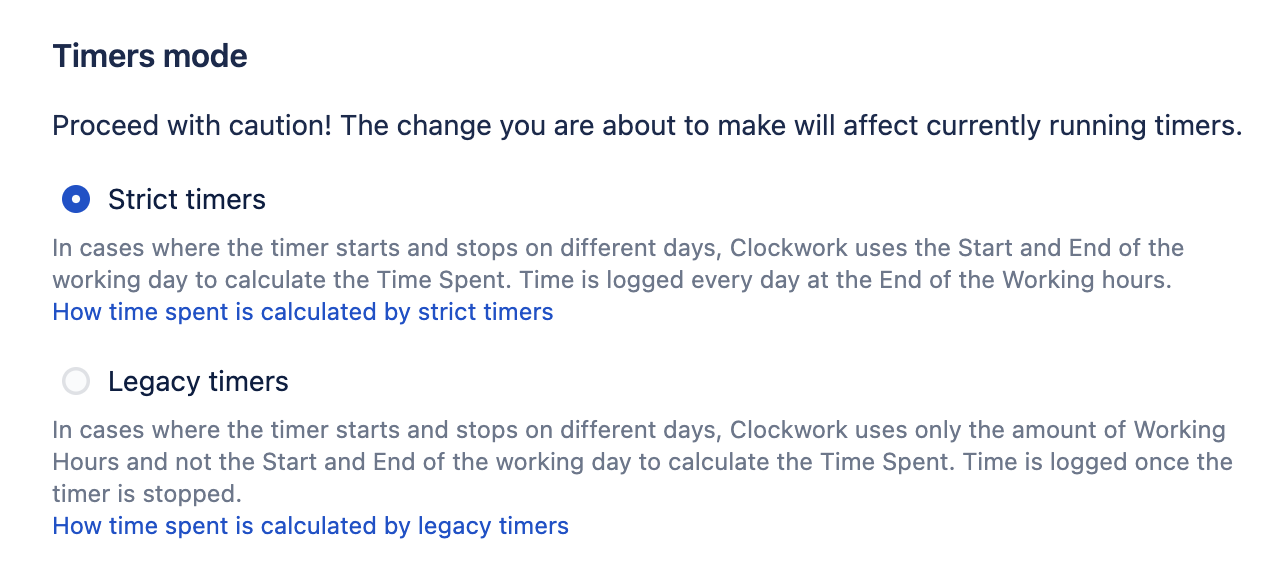
When configuring the time tracking method, you’ll also be given an option to use either Strict timers or Legacy timers. Using strict timers ensures you always have up to date information about the time that has been spent on an issue (even if the issue is still IN PROGRESS).
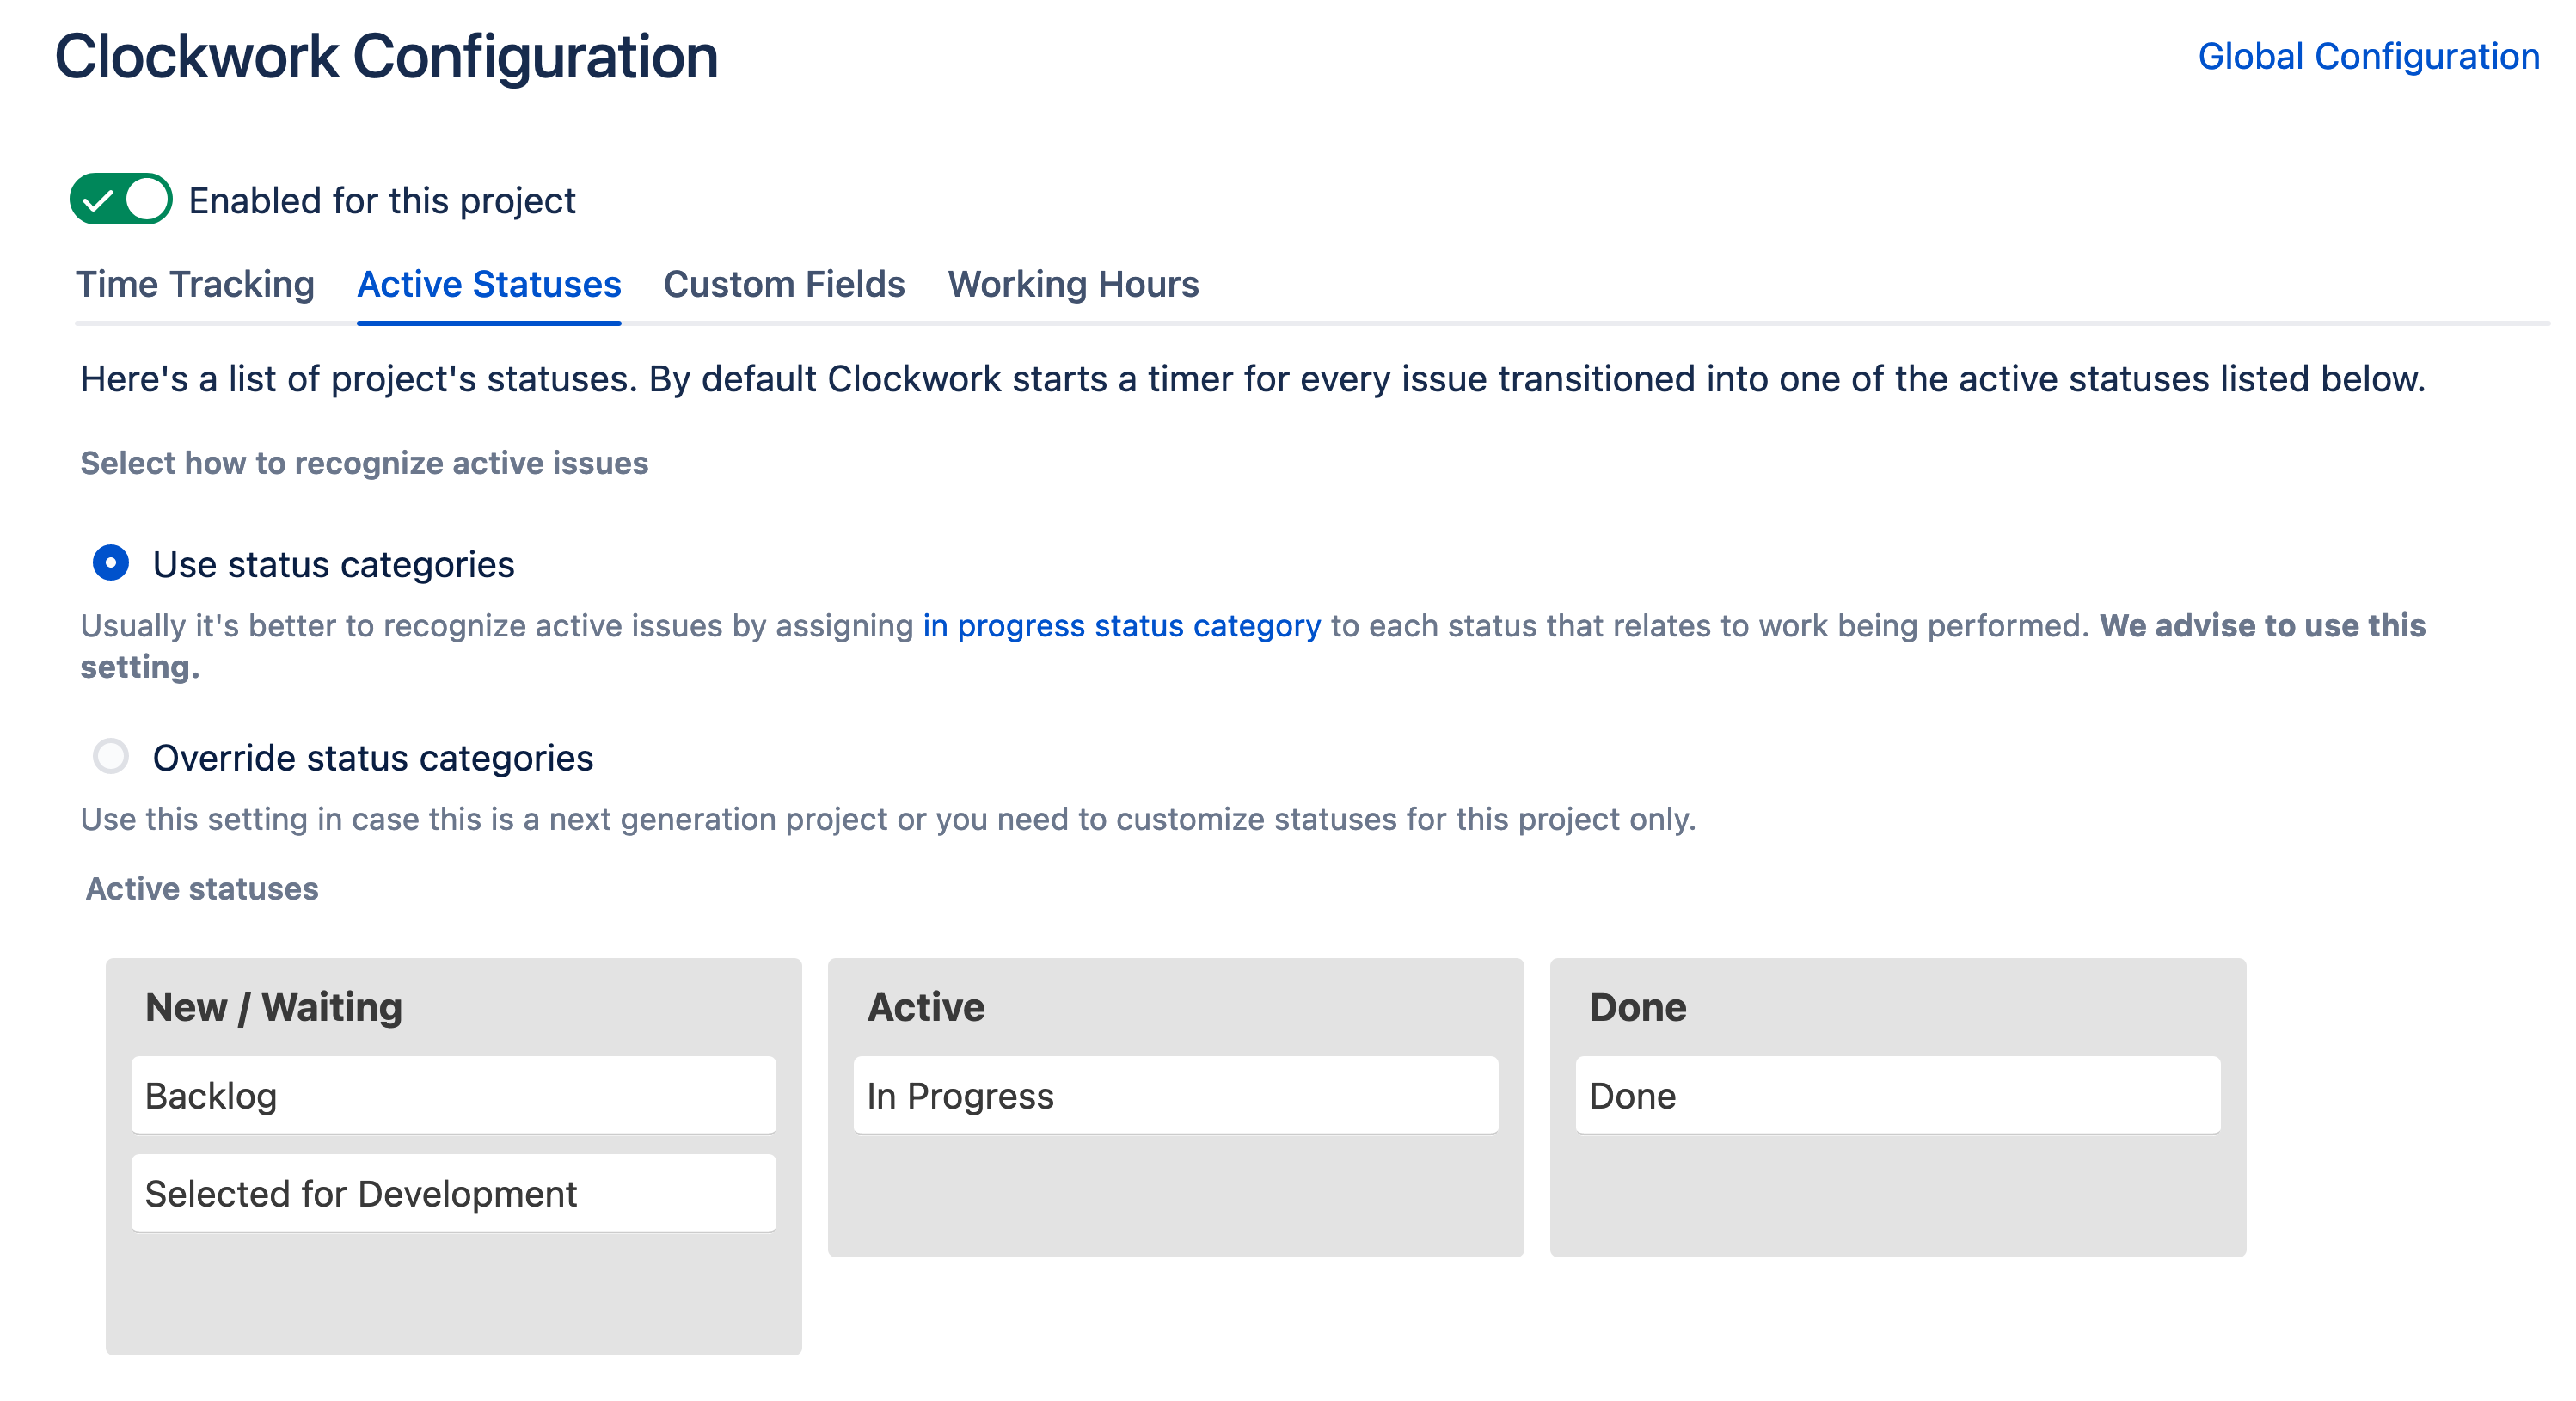
3. Set Active Status
Clockwork’s automatic time tracking will begin recording time for the assignee when the issue is moved into an “active” status. By default, any “In Progress” type status is considered active. However, you can customize active statuses at either the global (Jira Settings > Apps > Clockwork Configuration > Active Statuses tab) or project level (Project Settings > Apps > Clockwork > Active Statuses tab) simply by dragging the status to the appropriate column.
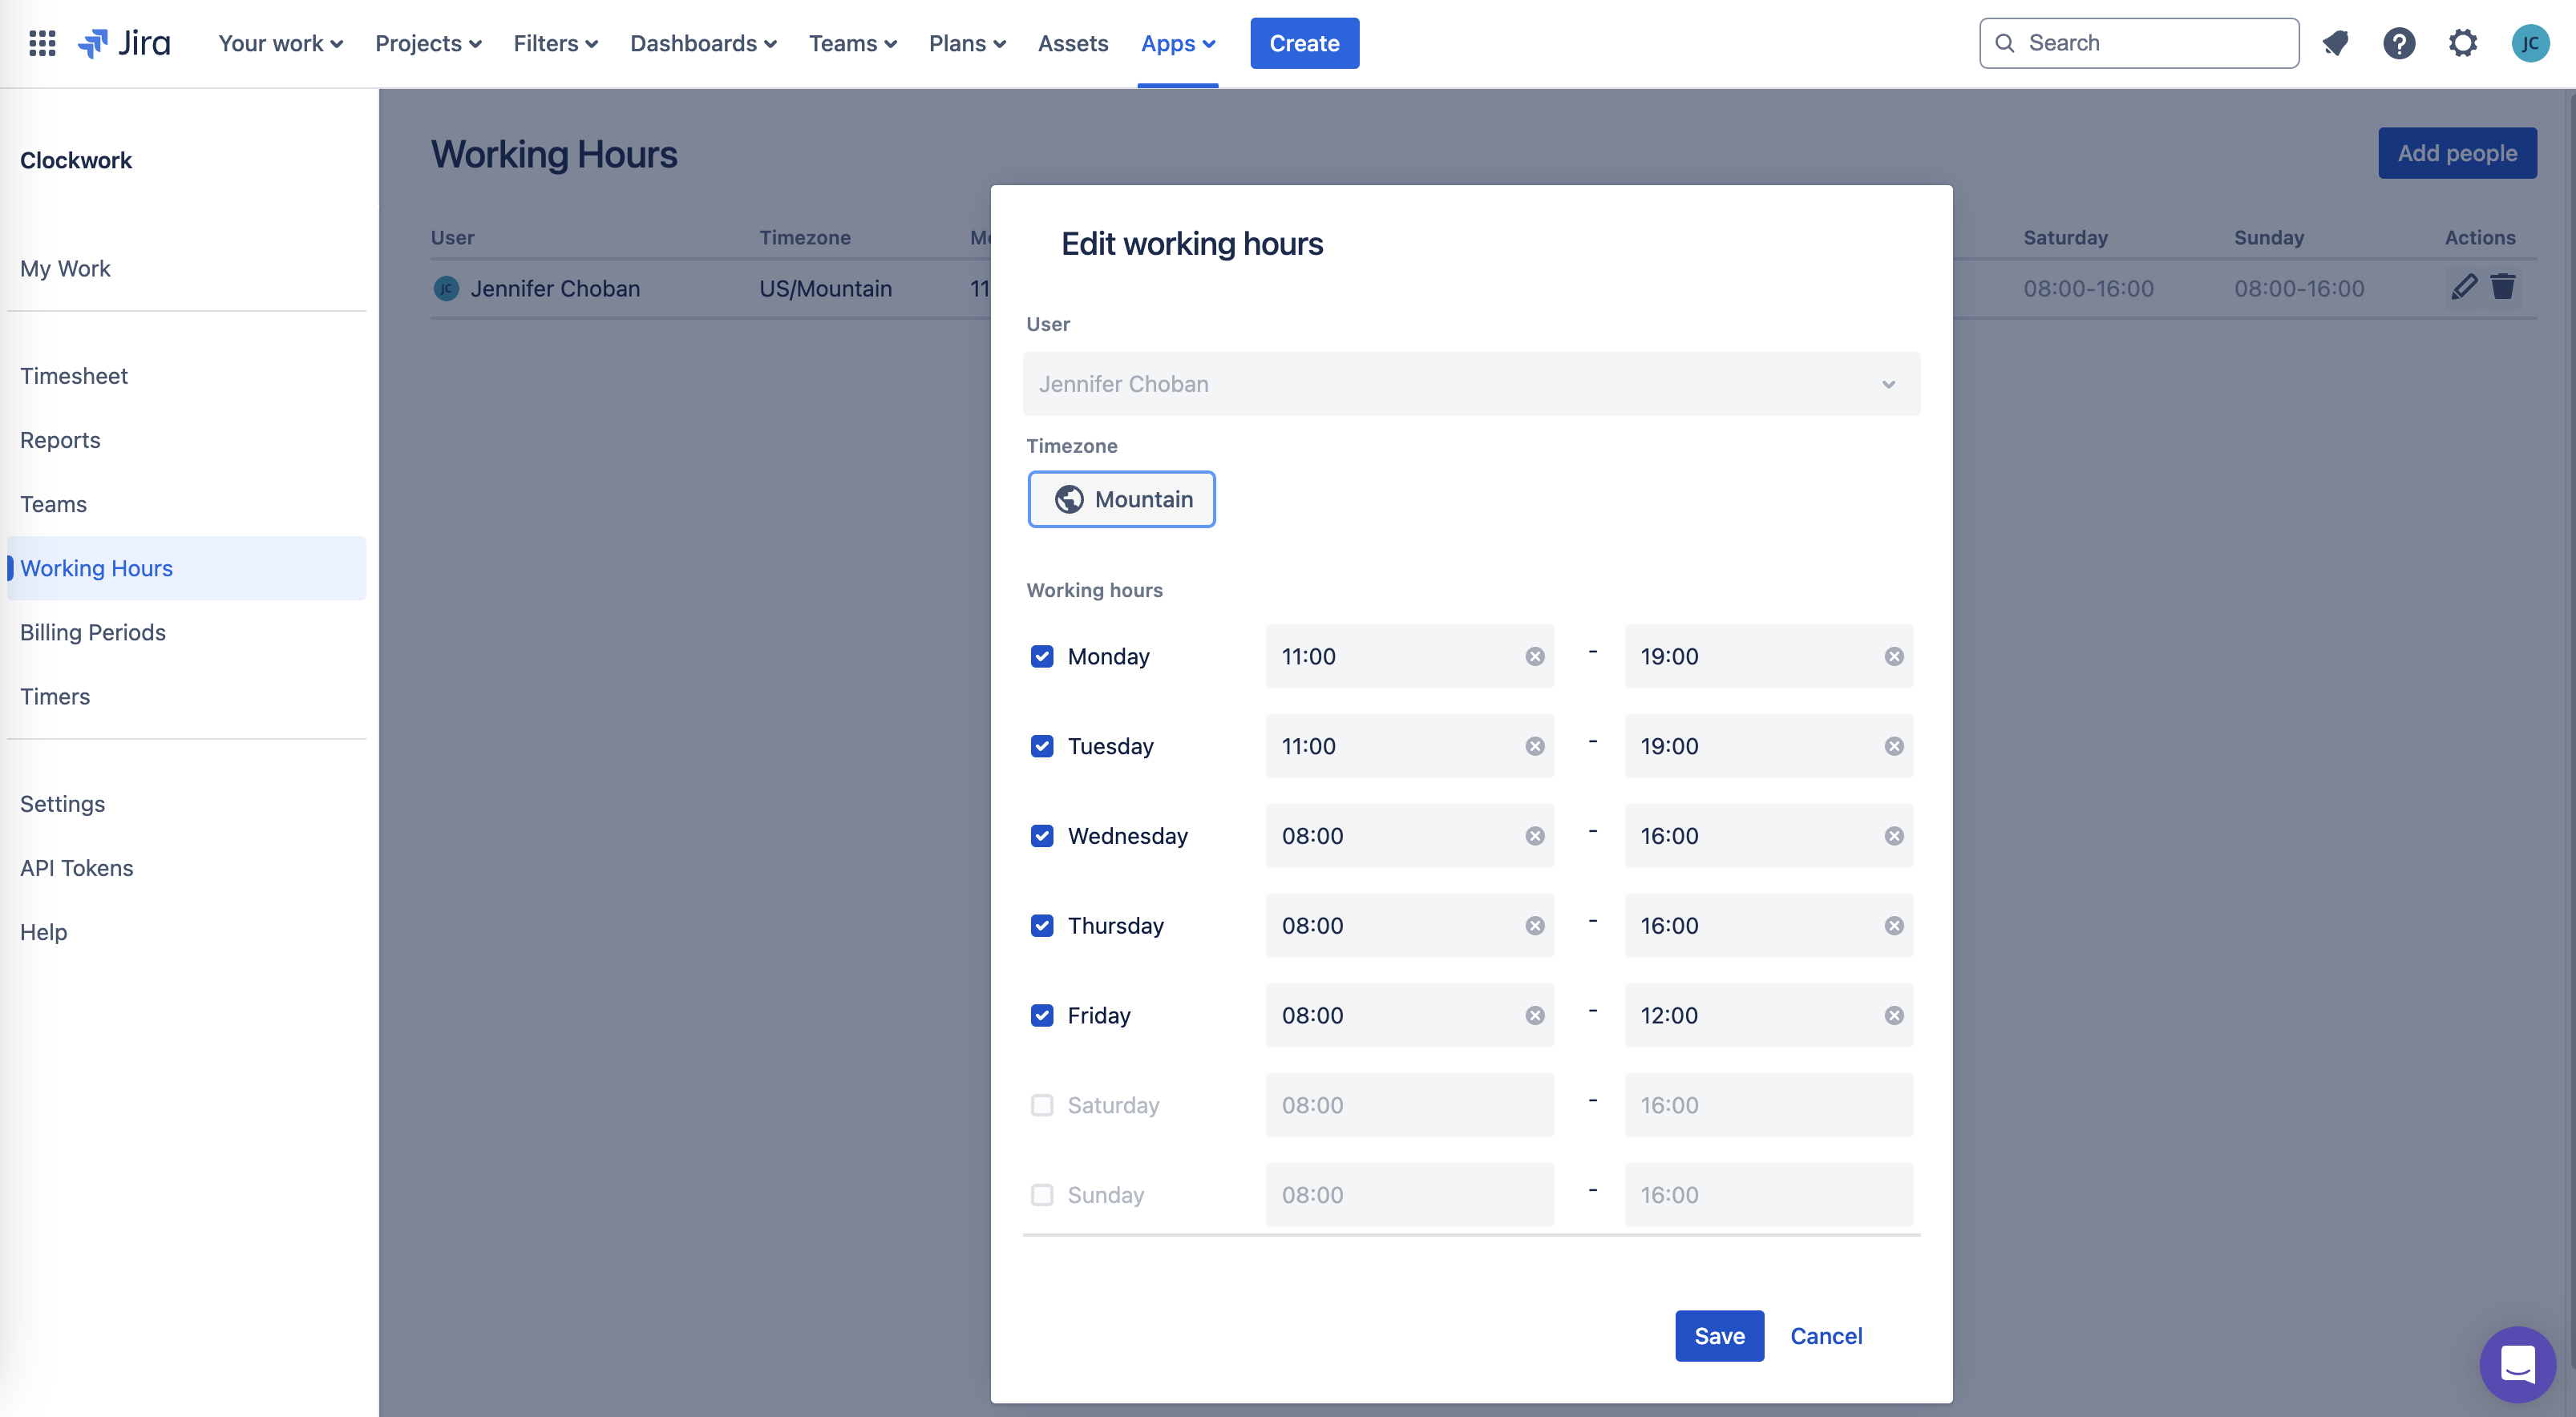
4. Set Working Hours
The final configuration needed for automatic time tracking is Working Hours. Since an issue can remain in an active status across multiple days, Clockwork uses Working Hours to calculate the actual time worked. As with other configurations, Working Hours can be set at multiple levels (global, project and user), and the most specific setting will be used:
- Global – Jira Settings > Apps > Clockwork configuration > Working Hours tab)
- Project – Project Settings > Apps > Clockwork > Working Hours tab)
- User – Select Clockwork from the Apps menu, and Working Hours from the left nav bar. Click on the pencil icon for the appropriate user to set the working hours.
Now that all the pieces are in place, you can go about your daily work without thinking about time tracking. Clockwork is taking care of that for you.


