The magic of Jira, and the promise of all project management software, is that you can define a task and then move it through appropriate workflow. The devil is in the details though. You also need to specify the specific types and properties of the task (your issue type and fields), and to keep workflow as simple as possible while still ensuring that all necessary steps are carried out.
Using a checklist lets you spell out the details of what needs to be done on each issue, without complicating your workflow. You can save time, standardize processes and increase efficiency even more by combining checklists with Jira automation and/or Jira workflow behaviors (such as workflow post functions and validators). Integrating checklists with workflows allows you to propel issues through your workflow like never before.
When to Use Jira Automation and When to Use a Jira Workflow Behavior
In some cases, you can achieve the same functionality either by using Jira automation or by using a Jira post function. When deciding which to use consider:
- Is the workflow shared between projects?
One Jira workflow may be used by multiple projects. Before making any edits to a workflow, including the addition of workflow behaviors, make sure the change is appropriate for all projects that use the workflow. - Who is responsible for implementing the process?
Project admins can create automation rules for their projects, but you need to be a Jira admin to add post functions to a workflow. Using Jira automation empowers the people who are most closely aligned with a project to have more control of what happens as issue move through the workflow. - Do you need to limit your use of Jira automation?
Atlassian recently implemented usage limits on Jira automation. If your team finds themselves running up against these limits, you might be better off using a post function rather than an automation rule.
Tip: Remember that a post function edits the issue after a transition has taken place. So if you are using post functions to add a checklist, you want to add the list that is appropriate for the next status in your workflow.
1. Add a Checklist Template on Transition
If you’ve created a useful checklist template, you can easily add it at any point in your workflow.
Jira Automation Rule
- Ensure the Apply checklist templates from issue labels global setting is enabled.
- Note the name of the template you wish to apply, and ensure that the name does not include spaces.
- Navigate to Project Settings > Automation.
- Click Create rule.
- Select the Issue transitioned trigger and click Save.
- Click New component and select New action.
- Select Edit issue.
- Select Labels as the field to be edited, and enter the name of the template.
- Click Save.
2. Replace Checklist Items on Transition
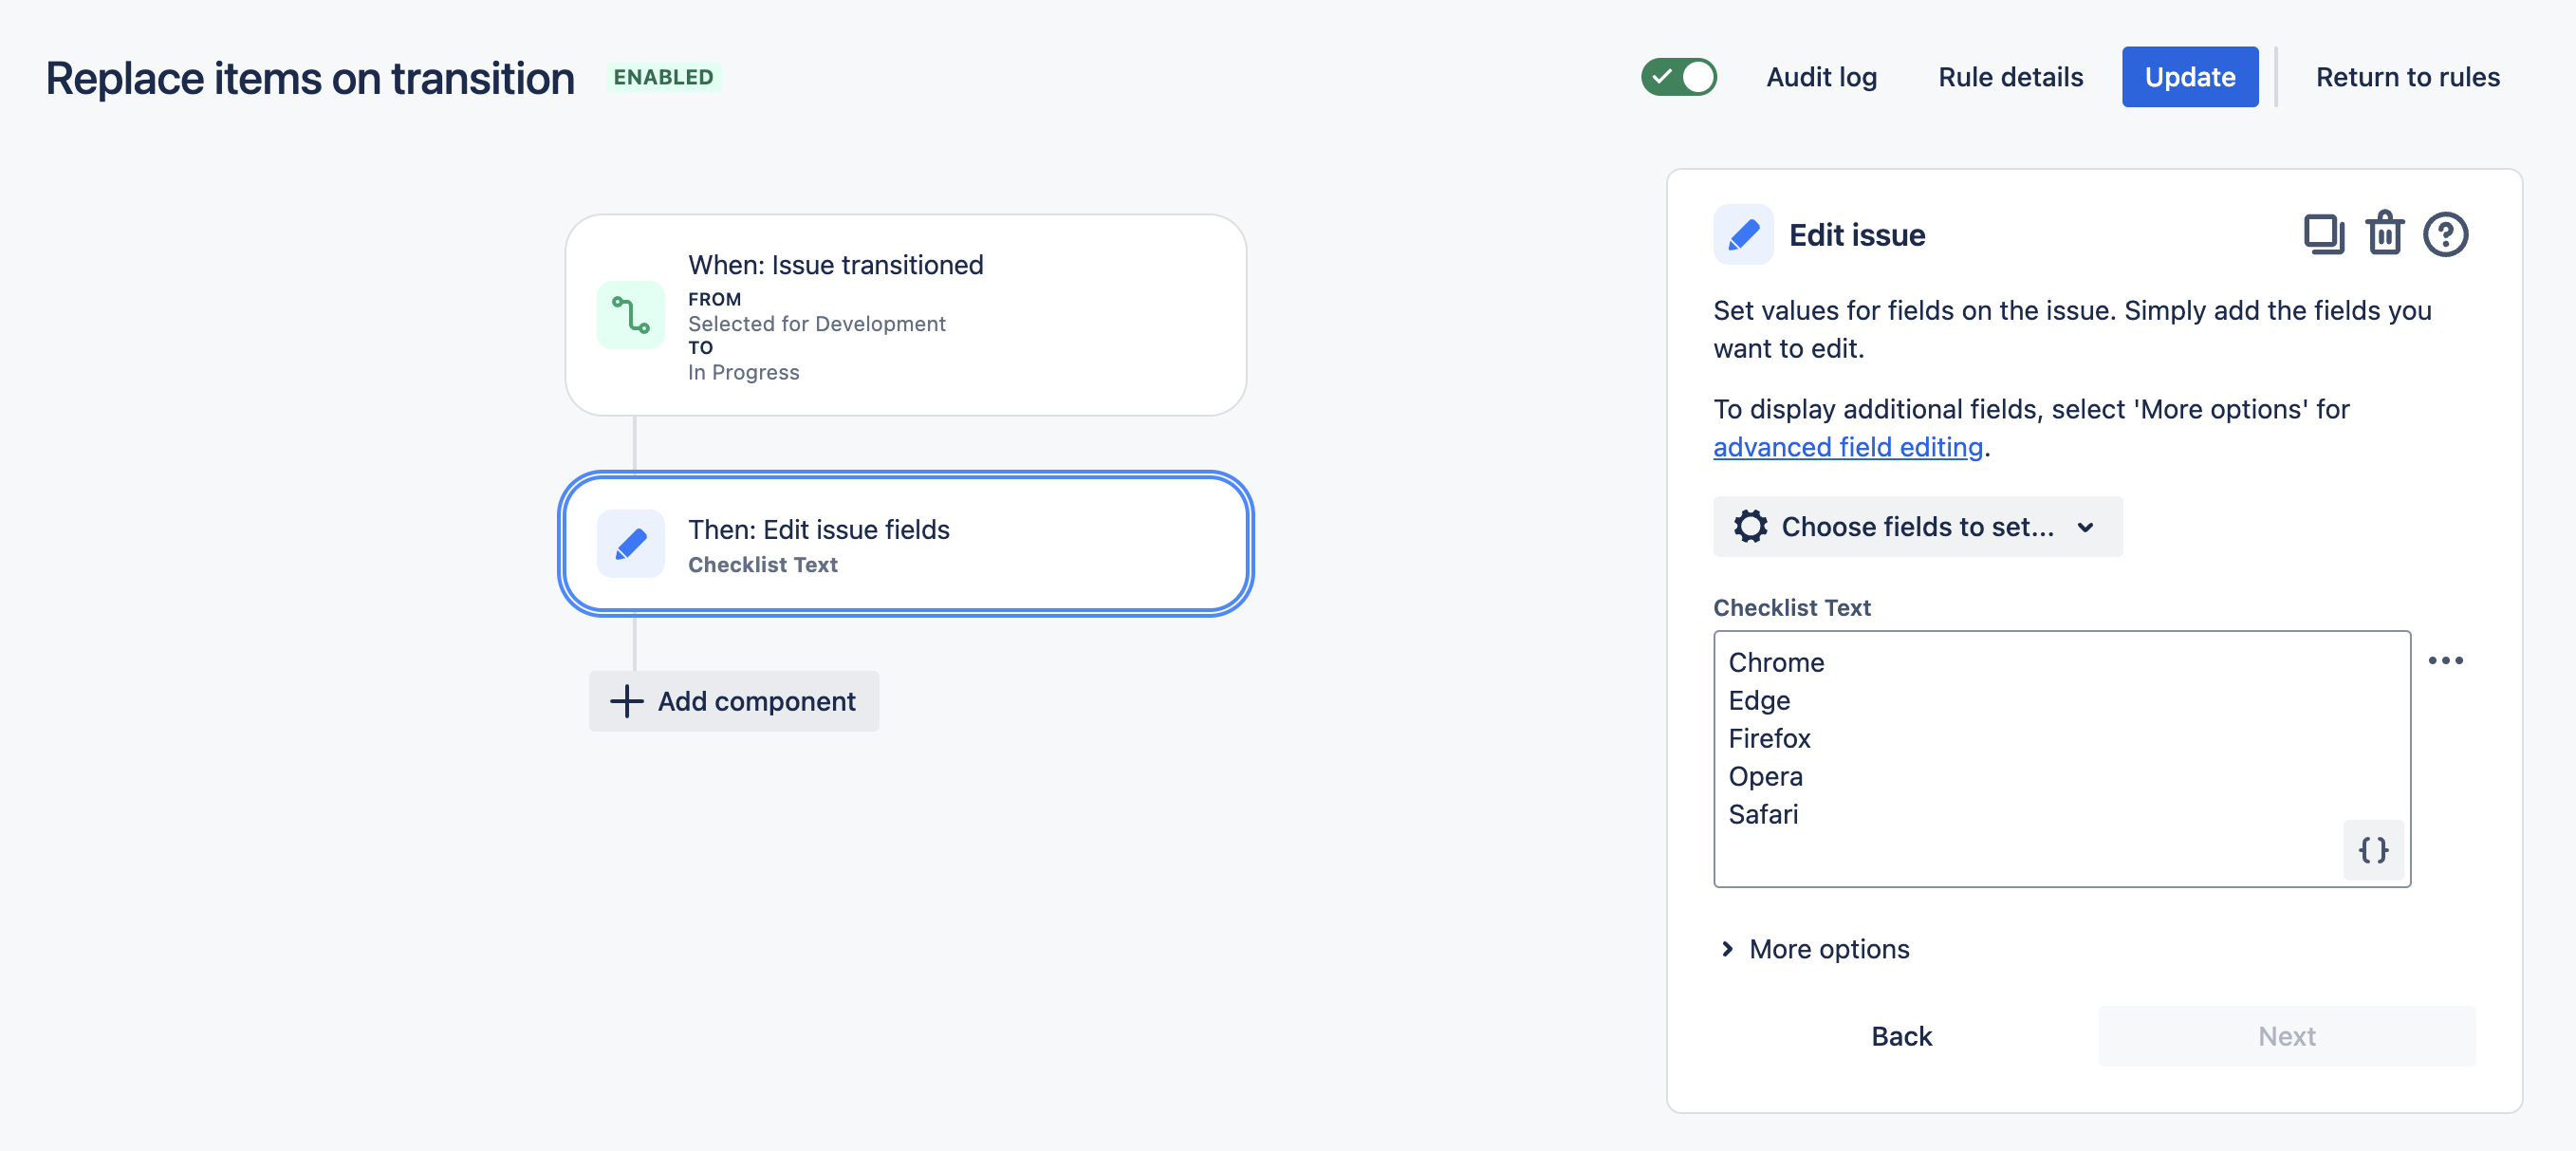
You can create a Jira automation rule or post function to replace the checklist items when an issue transitions to a new status. This is a great way to specify the exact steps that need to be carried out for each point in your workflow.

Jira Automation Rule
- Ensure the Save local checklist items to Jira custom fields global setting is enabled.
- Navigate to Project Settings > Automation (or Jira Settings > System > Automation rules).
- Click Create rule.
- Select the Issue transitioned trigger and the appropriate from and to statuses. Click Save.
- Click New action and select Edit issue.
- Select the Checklist Text field from the dropdown and provide the replacement checklist items.
- Click Save.
- Name the rule and click Turn it on.
Jira Workflow Post Function
- Ensure the Save local checklist items to Jira custom fields global setting is enabled.
- Navigate to Project Settings > Workflows
- Click the pencil icon to edit the workflow.
- Select Diagram mode and click on the transition where you want to add the post function.
- Click on Post Functions.
- Click Add post function.
- Select Update Issue Custom Field.
- Select the Checklist Text custom field.
- Paste in a formatted checklist. The easiest way to do this is to prepare a checklist on an issue and then copy it from the checklist editor.
- Click Add.
- Click Publish draft to save the changes to the workflow.
3. Clear a Checklist on Transition
When you need to clear a checklist, you can use either a Jira automation rule or post function:
Jira Automation Rule
- Ensure the Save local checklist items to Jira custom fields global setting is enabled.
- Navigate to Project Settings > Automation (or Jira Settings > System > Automation rules).
- Click Create rule.
- Select the Issue transitioned trigger and the appropriate from and to statuses. Click Save.
- Click New action and select Edit issue.
- Select the Checklist Text field from the dropdown.
- Click Save.
- Name the rule and click Turn it on.
Jira Workflow Post Function
- Ensure the Save local checklist items to Jira custom fields global setting is enabled.
- Navigate to Project Settings > Workflows
- Click the pencil icon to edit the workflow.
- Select Diagram mode and click on the transition where you want to add the post function.
- Click on Post Functions.
- Click Add post function.
- Select the Clear Field Value post function and click Add.
- Select the Checklist Text field and click Add.
- Click Publish draft to save the changes to save changes to the workflow.
4. Close / Reopen an Issue Based on Checklist Completion
You can also create Jira automation rules that transition an issue in response to the completion state of the checklist. This can be very useful for closing an issue when a checklist is complete and reopening an issue if the checklist becomes incomplete.
Jira Automation Rule
- Ensure the Save local checklist items to Jira custom fields global setting is enabled.
- Navigate to Project Settings > Automation (or Jira Settings > System > Automation rules).
- Click Create rule.
- Select the Field value changed trigger.
- Select the Checklist Completed field in the first dropdown and Edit issue in the second list. Click Save.
- Click New condition and select Issue fields condition.
- Select Checklist Completed from the list of fields. Select equals in the condition dropdown, and All Completed in the value text box. Click Save. Note that this condition will also be met if all checklist items are deleted. If you want to avoid this, add another condition that verifies that the Checklist Text custom field is not empty.
- Select New action and Transition issue. Select the appropriate status and click Save.
- Name the rule and click Turn it on.

5. Mark Checklist Items Complete
You can create a Jira workflow post function to mark all checklist items as complete when an issue is transitioned.
Jira Workflow Post Function
- Navigate to Project Settings > Workflows
- Click the pencil icon to edit the workflow.
- Select Diagram mode and click on the transition where you want to add the post function.
- Click on Post Functions.
- Click Add post function.
- Select the Complete All Checklist Items post function and click Add.
- Click Add again to confirm creation of the post function.
- Click Publish draft to save the changes.
6. Validate that a Checklist is Complete
You can validate that all items on a checklist (or all mandatory items, or a specific item) have been completed before an issue is transitioned.
Jira Workflow Validator
- Navigate to Project Settings > Workflows
- Click the pencil icon to edit the workflow.
- Select Diagram mode and click on the transition where you want to add the validator.
- Click on Validators.
- Click Add validator.
- Select the All checklist items are completed validator and click Add.
- Click Add again to confirm creation of the validator.
- Click Publish draft to save the changes.


