A Jira Workflow is the backbone of Jira’s project management functionality. It defines the path an issue takes from creation through to completion, helping teams ensure that all needed parts of a process are carried out. A well-structured workflow makes processes more streamlined and efficient, assures compliance and makes progress visible for team members and stakeholders.
What is a Jira Workflow ?
Every Jira issue will pass through certain stages (statuses in Jira speak) on it s way to completion, and will have a mechanism (a transition) to move it between those statuses. These two elements are the foundation of all workflows.
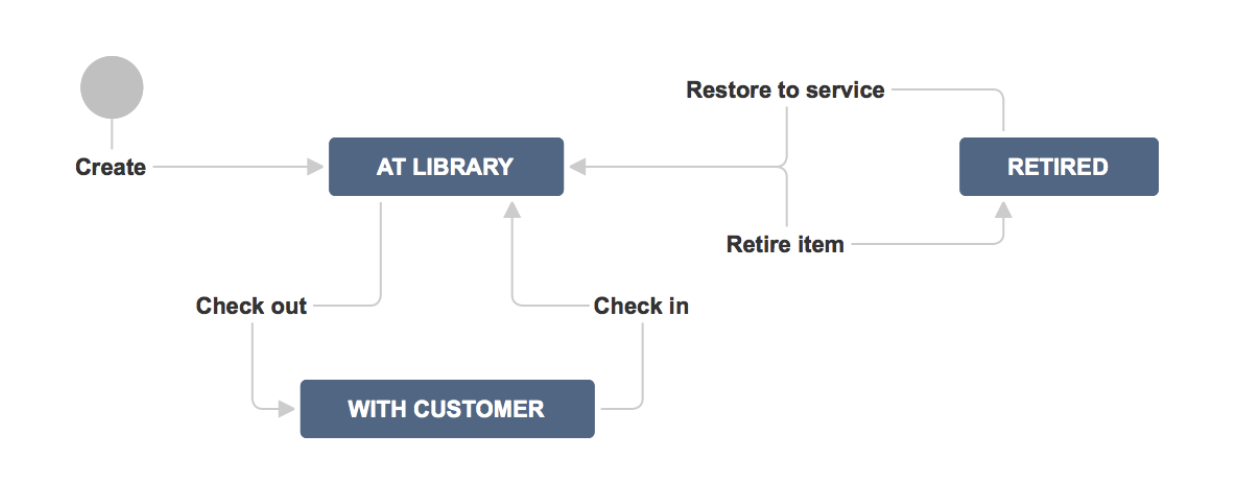
In the example Jira workflow below, every issue represents a library book. The statuses represent the state of the book, and the transition are the paths the books take between statuses.
Jira Workflow Statuses
Jira issue statuses are the building blocks of your Jira workflow. The type of statuses you use will depend on the purpose of your project:
- Agile Development Workflow: Agile workflows typically include statuses like “Backlog,” “To Do,” “In Progress,” “In Review,” and “Done.”
- Bug Tracking Workflow: For teams focused on QA and bug tracking, a workflow might include statuses such as “Reported,” “Under Investigation,” “Fixed,” and “Verified.”
- Content Creation Workflow: Content teams may follow a workflow that includes “Ideation,” “Writing,” “Editing,” “Approved,” and “Published.”
- Service Management Workflow: Workflows for service teams are designed to manage communication between agents and customers and may include statuses like “Waiting for Support,” “Waiting for Customer,” and “Escalated”.
It’s good practice to give your statuses short, descriptive names, and to resist the temptation to create too many of them.
Jira Workflow Transitions
Understanding transitions will enable you to streamline your Jira workflows, making your teams more efficient. Looking at sample Jira workflows, you’ll notice that transitions tend to move work through the statuses in one of three ways:
- Simplified Jira Workflows have global transitions that allow issues to be transitioned to the target status from any other point in the workflow.

- Common Jira Workflow transitions connect one status to another. They are good for linear workflows where you want to ensure a specific order of operations (i.e. you want to know that an NDA has been signed before giving a new team member access to your systems, or to ensure content is approved before it’s published).

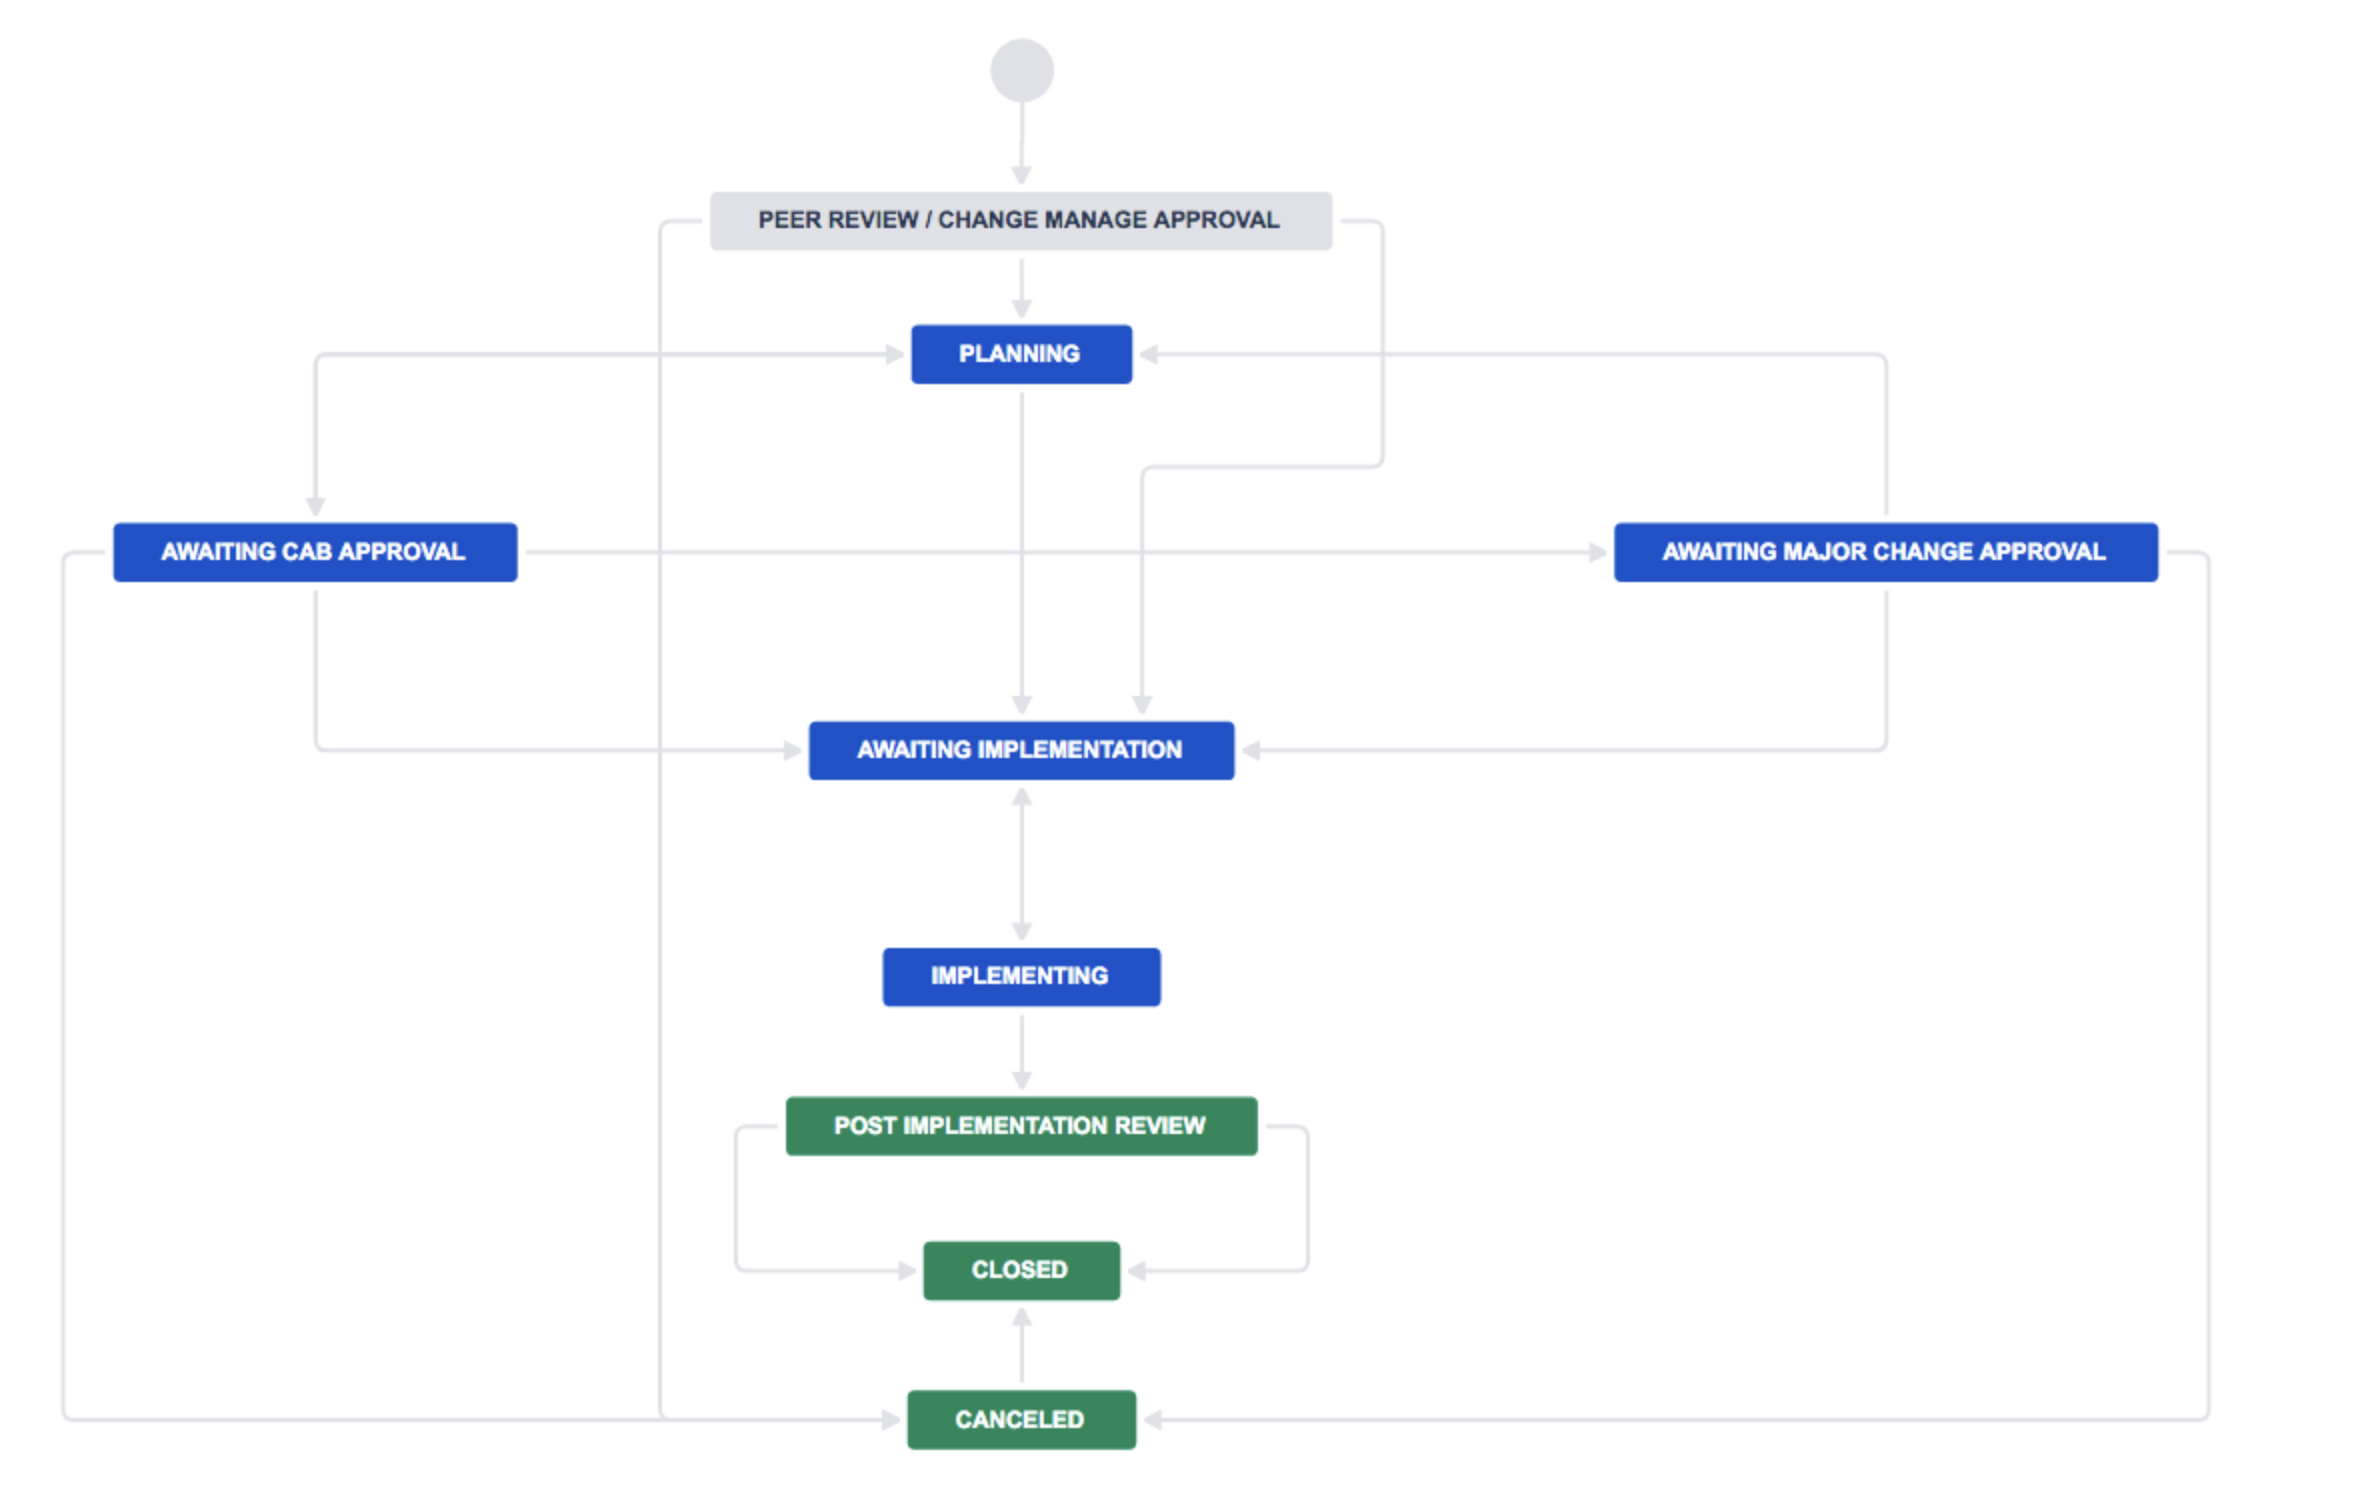
- You may also encounter Conditional Jira Workflows that branch off in multiple directions. This adds flexibility to your workflow and allows you to depending on a certain circumstance, such as approval by a supervisor, or the value in a given field. In the change management workflow below an issue can be fast tracked for implementation by the change manager, can be sent to the CAB for approval, or can be canceled. A further level of approval is included for major changes and the issue can be canceled at any of the approval points.
Jira Workflow Schemes: How to Relate a Jira Workflow to an Issue Types
A Jira workflow is assigned to a Jira issue type in a project via a workflow scheme. A project may use one or more workflows and a given workflow may be used in multiple projects. Likewise, multiple issue types within a project can use them same workflow. However, each issue type can only be mapped to one workflow. This flexibility allows organizations to use different workflows for different types of projects or issues, ensuring that each task follows the necessary path through to completion.
Workflows are created as drafts and then added to a scheme in order to be published. Create the workflow first. Then add it to the project’s workflow scheme. You’ll be prompted to specify which issue types the workflow applies to when you add it to the scheme.

Creating or Customizing a Jira Workflow
When setting up workflows in Jira, you have several options:
- Create a new workflow from scratch
The fresh start approach can be useful when you know the specifics of what you want, and are sure that it doesn’t already exist. Draw the process out on paper first. Talk it through with the team that will be using the workflow to make sure that you have a complete understanding of their process before building it into Jira. - Share an existing workflow that was created for another project
Adding a new dev project? Chances are the same workflow your existing dev teams are using will work for them. To share a workflow, simply add it to the new projects workflow scheme. - Start from a workflow template
If you use a project template to create your Jira project (Projects > Create project) , it will come with a pre-built workflow. While project templates tend to use simplified workflows, you can rework the transitions to support the order of operations your team uses.
The Atlassian Marketplace also has Workflows. Navigate to Jira settings > Issues > Workflows. Click on the Add workflow dropdown and select Import from marketplace. The Marketplace is good for finding example workflows created for niche processes such as libraries, procurement, production lines, etc. You can select a workflow from here and import it to your Jira instance. It will then be listed among your inactive workflows.
The best strategy is ofter to start with a workflow template and make the needed customizations.
Jira Workflow Diagrams
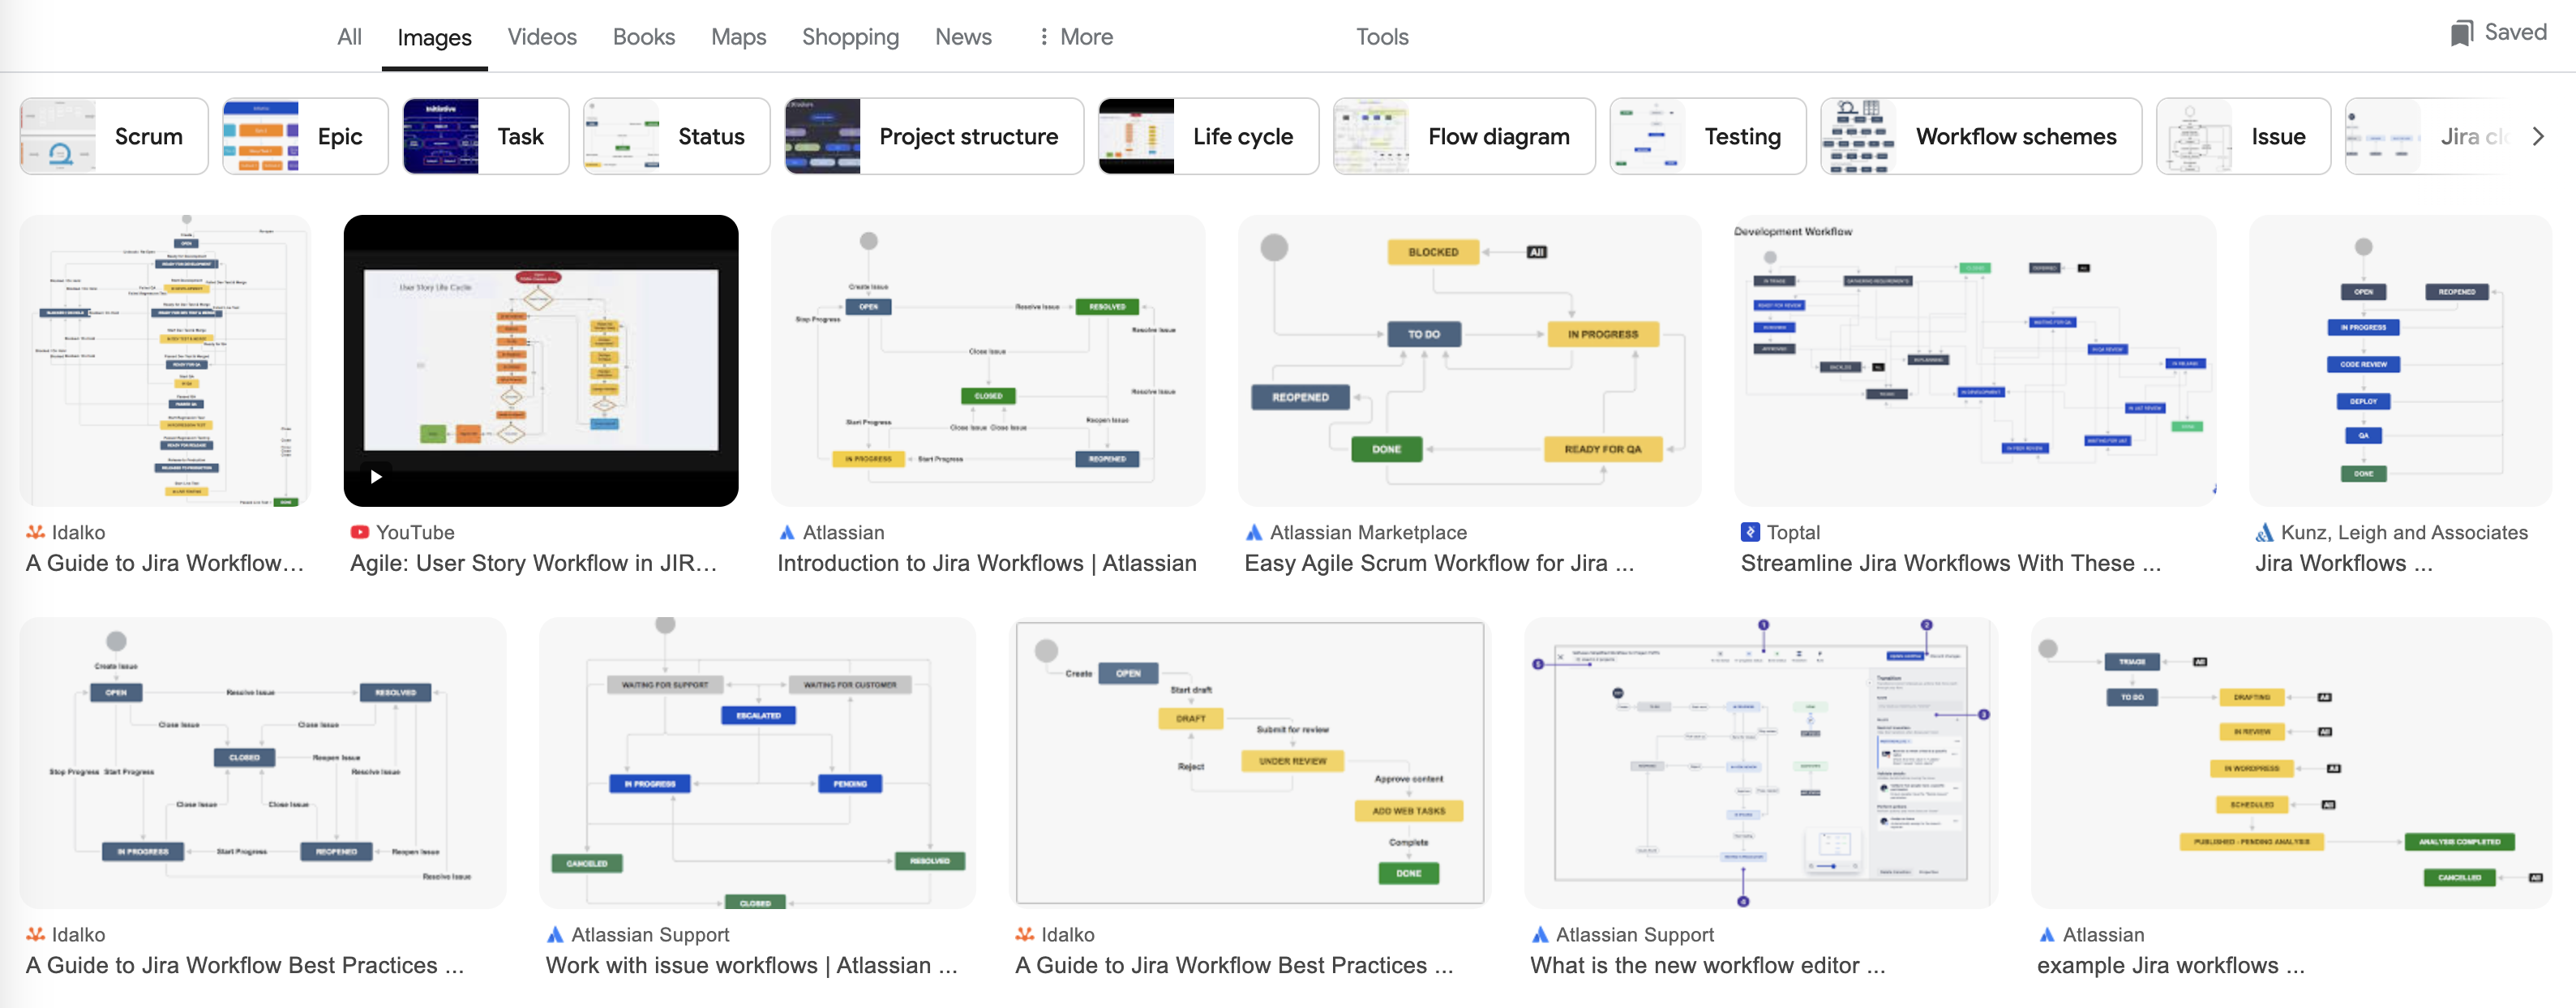
Searching Google Images for “Jira Workflow examples” shows Jira workflow diagrams which can be studied (and copied!) to learn about understand different workflow structures.
Using the Jira Workflow Editor
Whether you’re customizing an existing workflow, or starting from scratch, changes are made in the Jira workflow editor. Navigate to Jira settings > Issues > Workflows:
- To create a new Jira workflow, click Create workflow, or select a similar workflow to what you want to create as a starting point. Click on the … menu and select Copy.
- If you added a workflow from the Marketplace, search for it on the Inactive workflows tab. Click on the … menu and select Edit.
- To customize an existing workflow that’s already in use, locate the workflow on the Active workflows tab. Click on the … menu and select Edit. This will create a copy of the workflow that you can make changes to.
The workflow editor offers two modes: Diagram
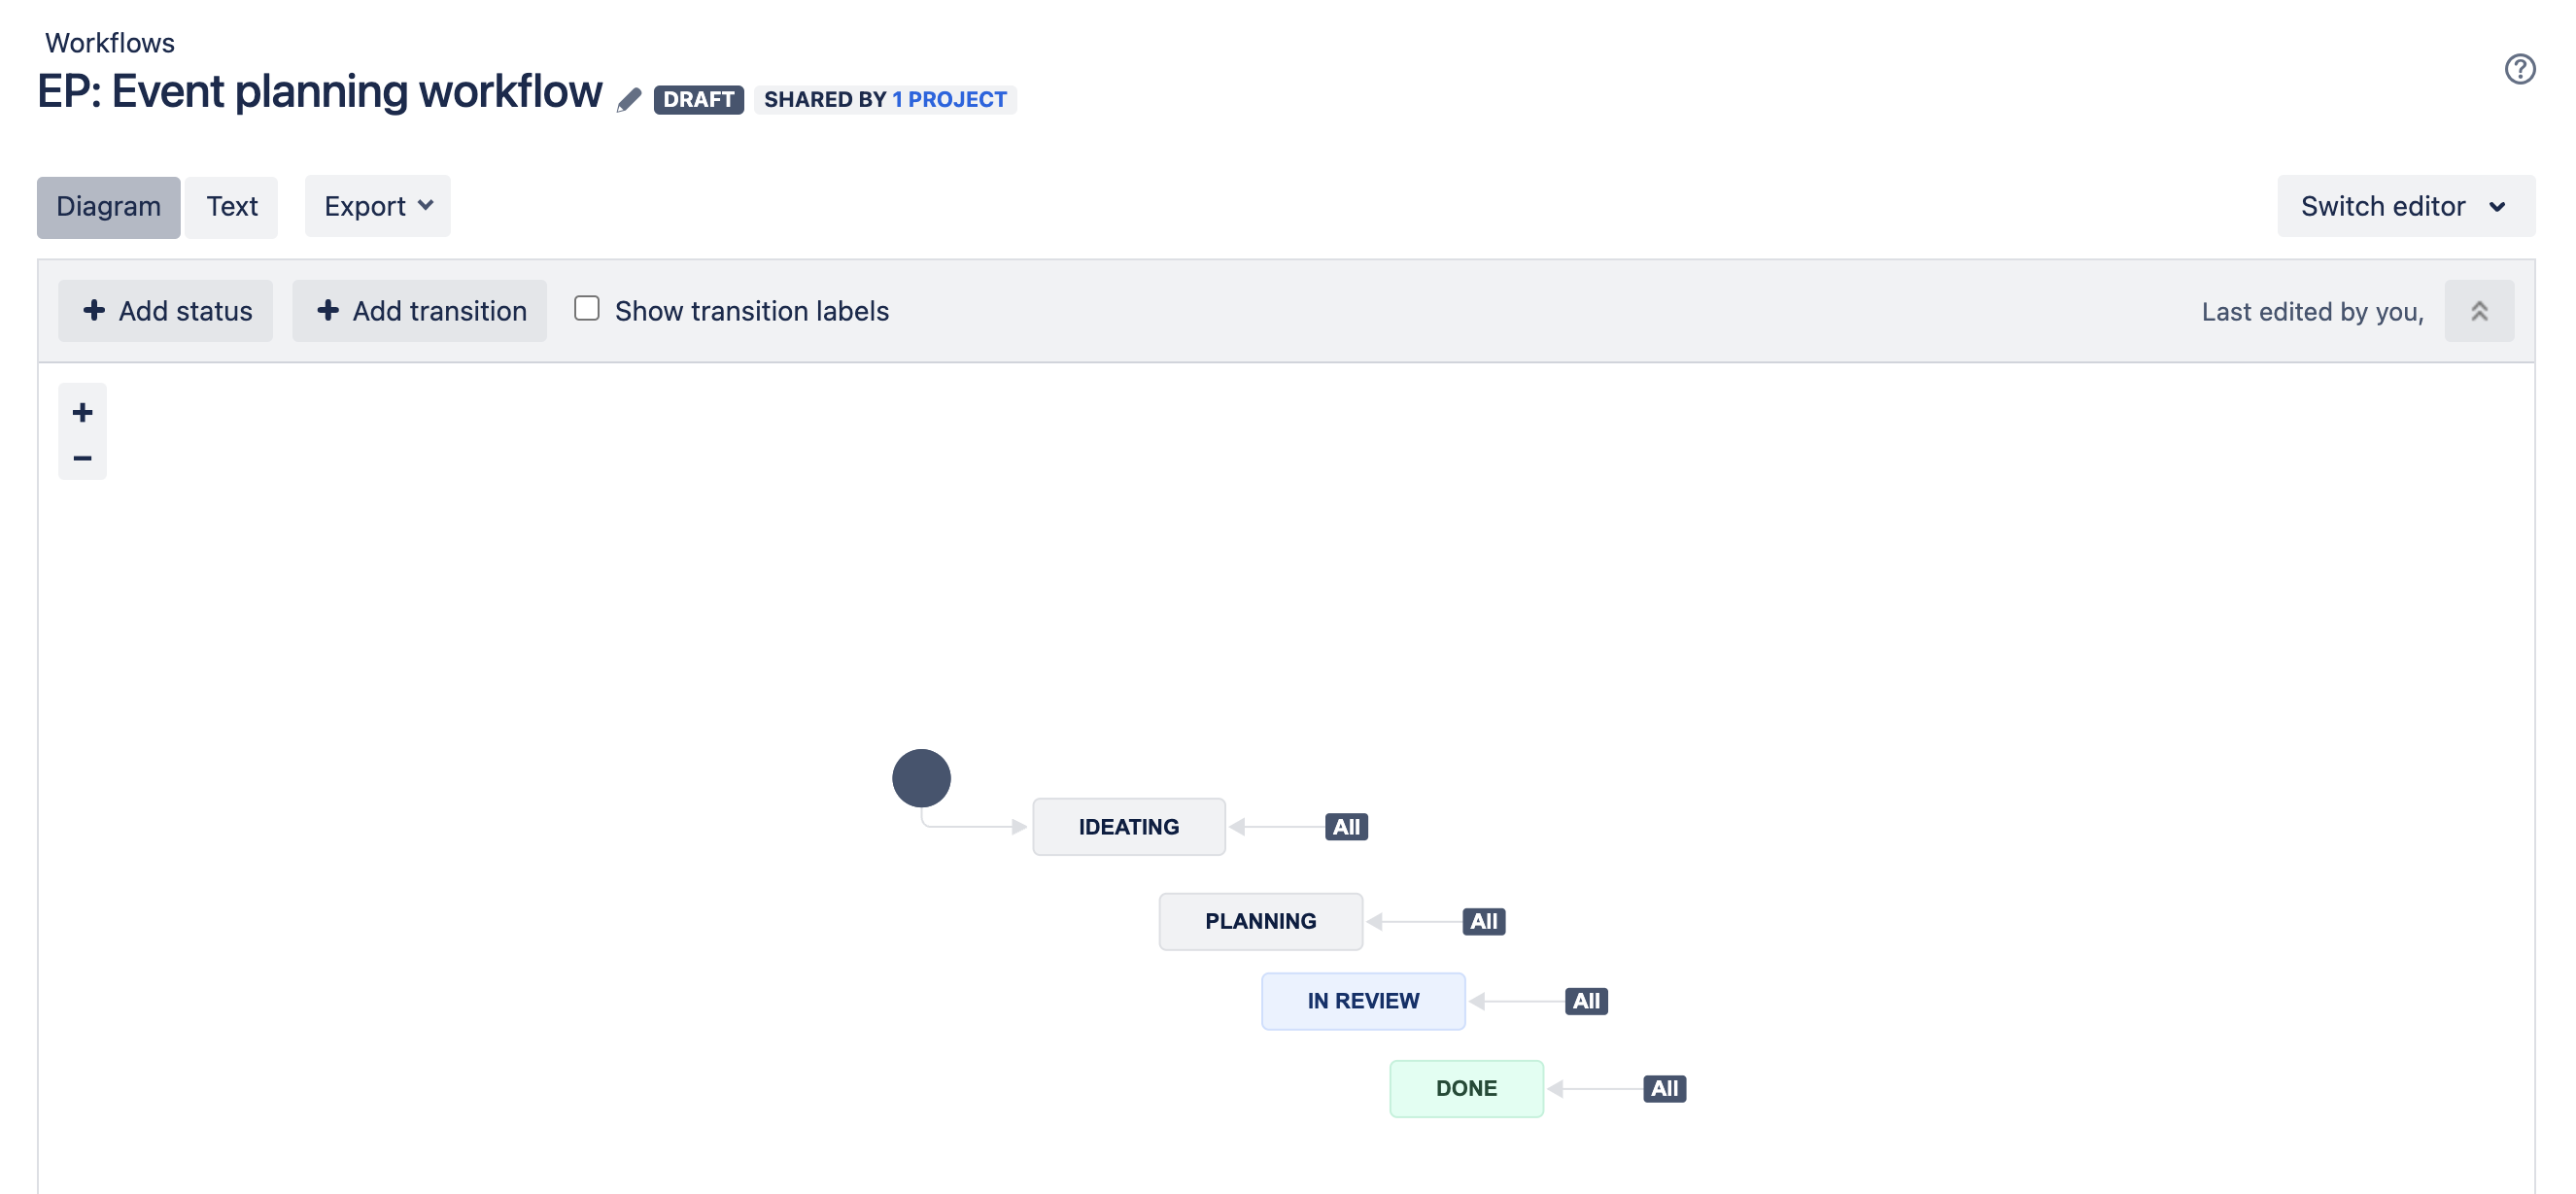
and Text. You can work in whichever mode is most comfortable for you..
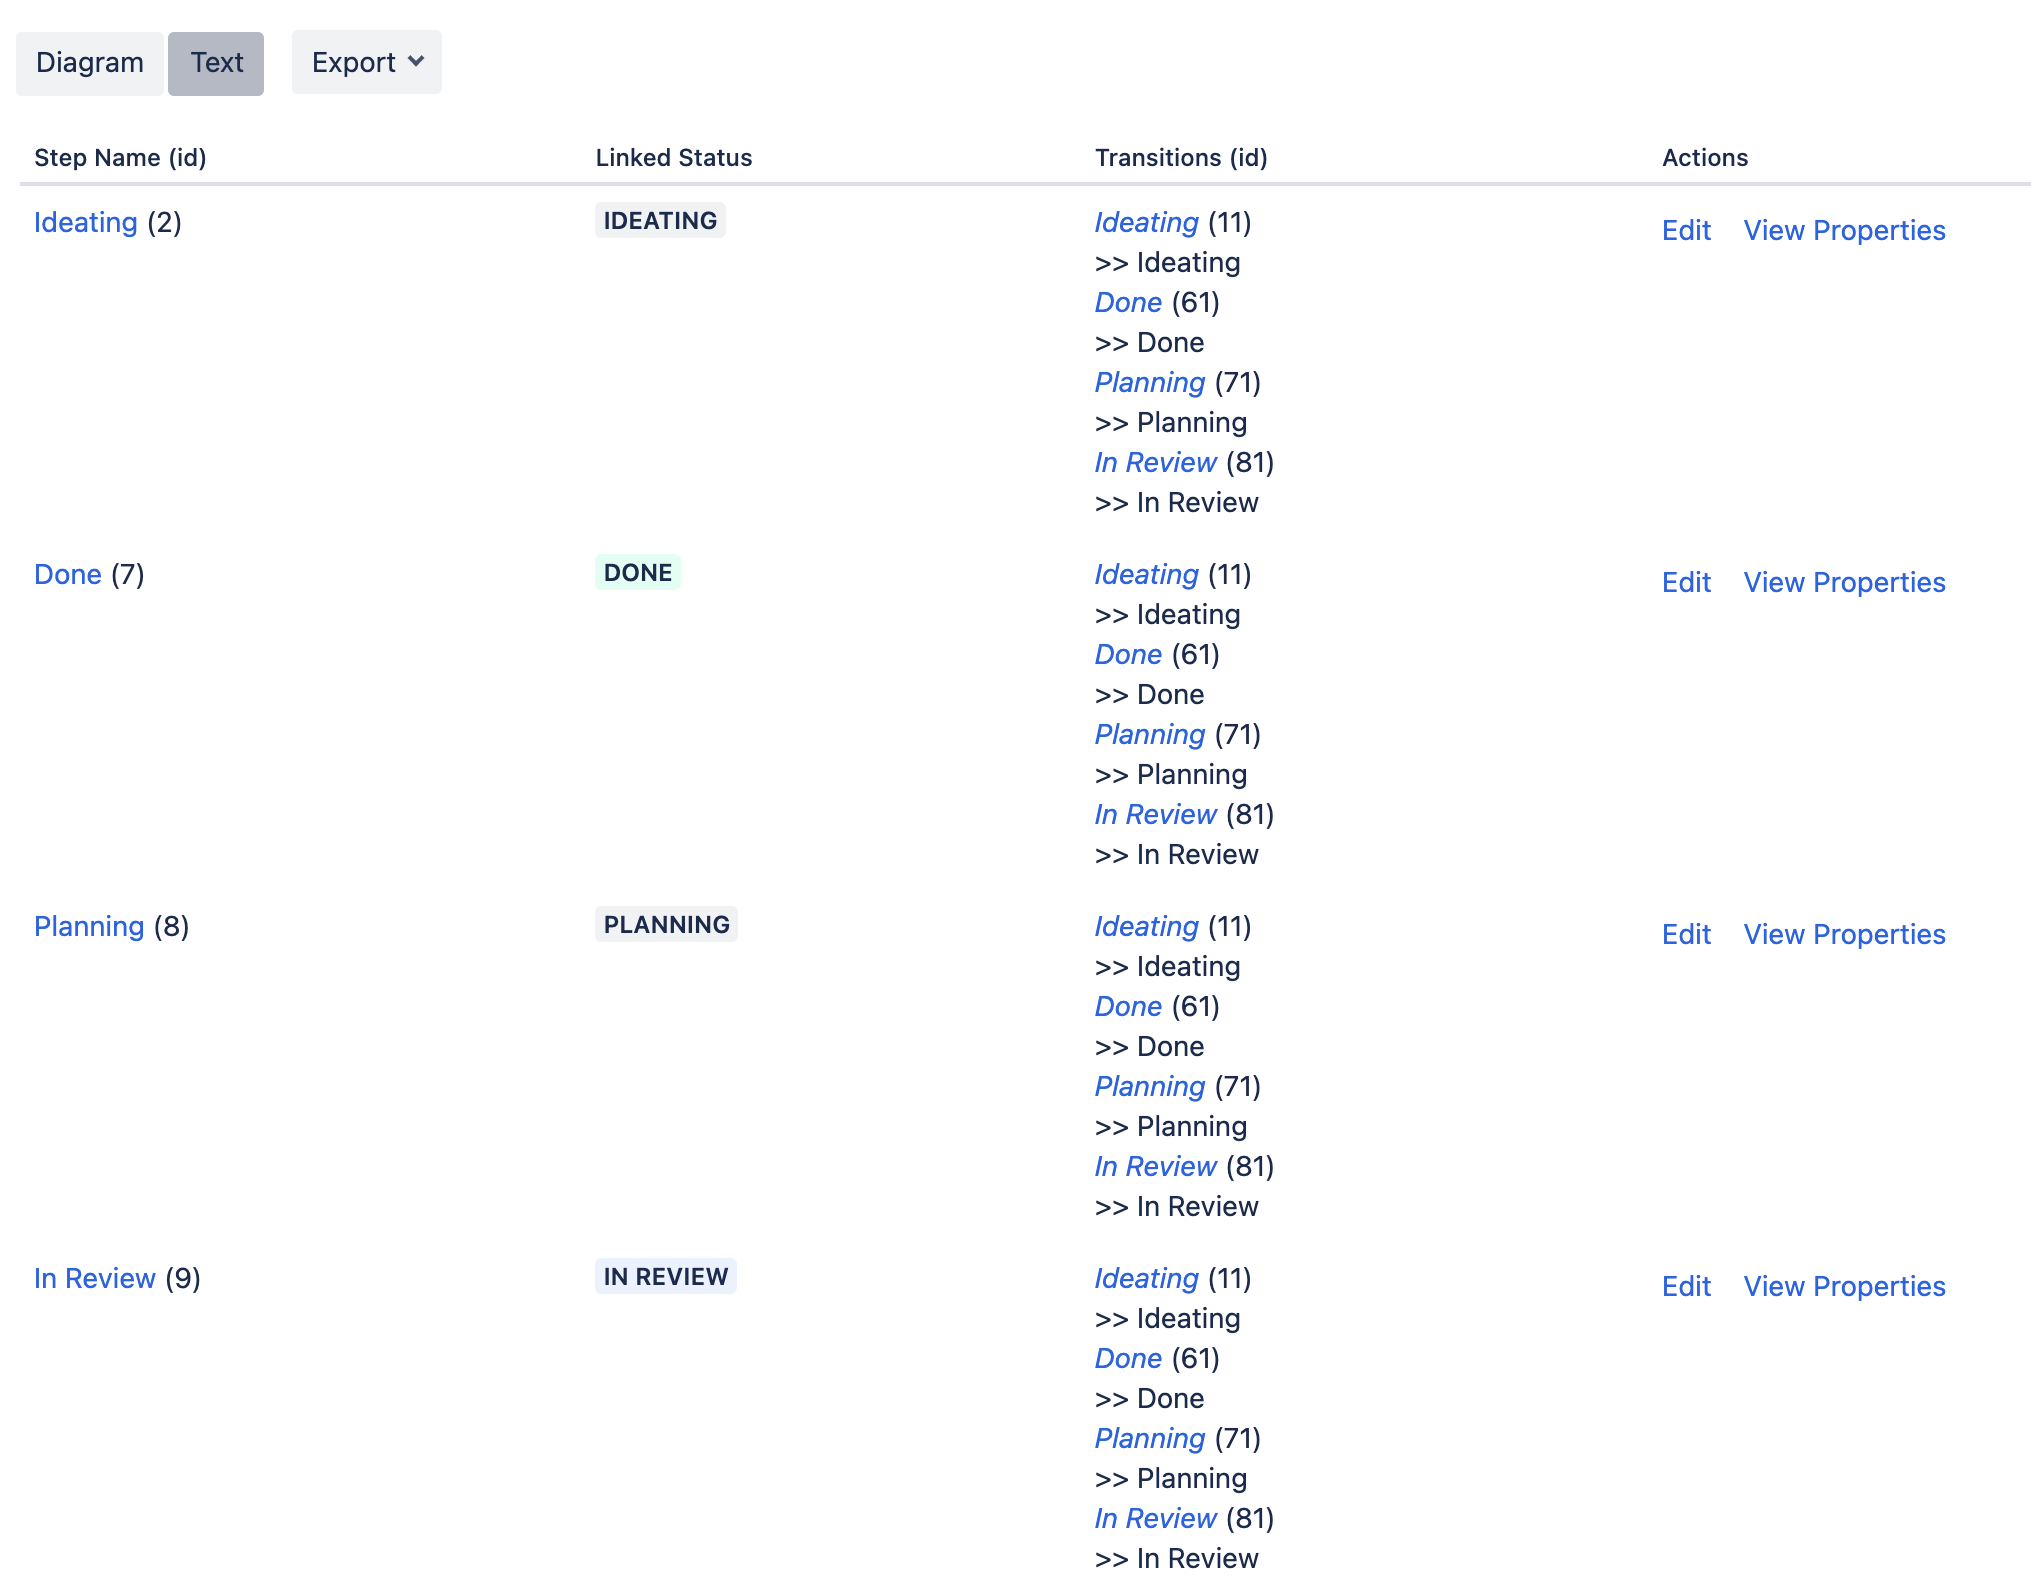
Use the buttons at the top to add new statuses and transitions. Be wary of changing the name of an existing status. Statuses may be shared across multiple workflows (even if the workflow itself is only used by one project) so any changes will be reflected in other workflows.
Also note that you cannot delete a status that has a transition. If you want to change the first status in a workflow, create the new status first, and then drag the initial transition (the one coming from a gray circle) to the new status.
There are multiple “anchor points” on statuses in diagram mode. If you want to move a transition, click on it. Grab the transition from the dot at its endpoint and drag it to the desired location. This can make your Jira workflow diagrams more readable.
When editing a previously existing workflow, Jira creates a draft copy. When you’re done editing, you need to click on the Publish Draft for your changes to take effect.

Adding Power to Your Jira Workflow
Once you have your basic Jira workflow in place, you can add more power to your workflow with Jira automation, workflow behaviors, and Marketplace apps). These tools allow you to:
- Streamline processes by automatically transitioning Jira issues
- Increase compliance - by controlling who, when and under what circumstances an issue can be transitioned
- Ensure accurate information - by updating field values as the issue progresses through the workflow
Let’s take a closer look at each of these options.
Automation in Jira Workflows
You can integrate Jira automation with your workflows by:
- Creating rules that are triggered by a workflow transition
- Creating rules that automatically transition an issue
Combining Jira automation with your workflow can drastically increase efficiency by eliminating repetitive tasks and allowing team members to focus on high-priority work.
Jira automation rules use a simple three-ingredient recipe: Trigger | Condition | Action. For example, you can create a rule that says:
Trigger: When the issue is transitioned to the IN PROGRESS status
Condition: If the issue type equals TASK
Action: Assign the issue to the user who executed the event
Head over to the Jira Automation Playground to see example rules and get an idea of the extensive functions that can be carried out with Jira automation.
Jira Workflow Properties, Conditions, Validators and Post Functions
Click on any Jira workflow transition and your’ll see a list of options – Properties, Conditions, Validators and Post Functions – collectively known as Transition Behaviors or Transition Options. These are Jira’s built-in options for adding power to workflows:
Workflow Properties - let you to add an extra level of control over what can be done, and by whom, at specific points in your workflow. Properties include:
- jira.issue.editable – This property can be set to true or false to allow the issue to be editable when it’s in a particular status
- jira.permission – Permission properties can be used to restrict (beyond what is controlled by the permission scheme) which users can execute which actions.
- jira.field.resolution – The resolution property can be set to include or exclude, allowing you to control which Resolutions are available on a given transition.
Workflow Triggers – allow you to automatically transition a Jira issue in response to an event in a development tool (Bitbucket, GitHub, GitHub Server, Crucible and Fisheye).
Workflow Conditions – empower you to control by whom, and under what circumstances, an issue can be transitioned. If the condition is not met, then the user will not be shown the transition option. In some cases, this will mean that a given user will not have the option to transition the issue at all.
Workflow Validators – Validators check for a certain condition before allowing the transition. In this case the user will always see the option to transition the issue, but if the validator is not met, then the transition will fail and the user will get an error message.
Workflow Post Functions – Are actions (such as updating a field value) that happen after an issue is transitioned. Note that every transition will include five post functions by default, that you won’t want to change. Also the order in which post functions are listed is important, as described here.
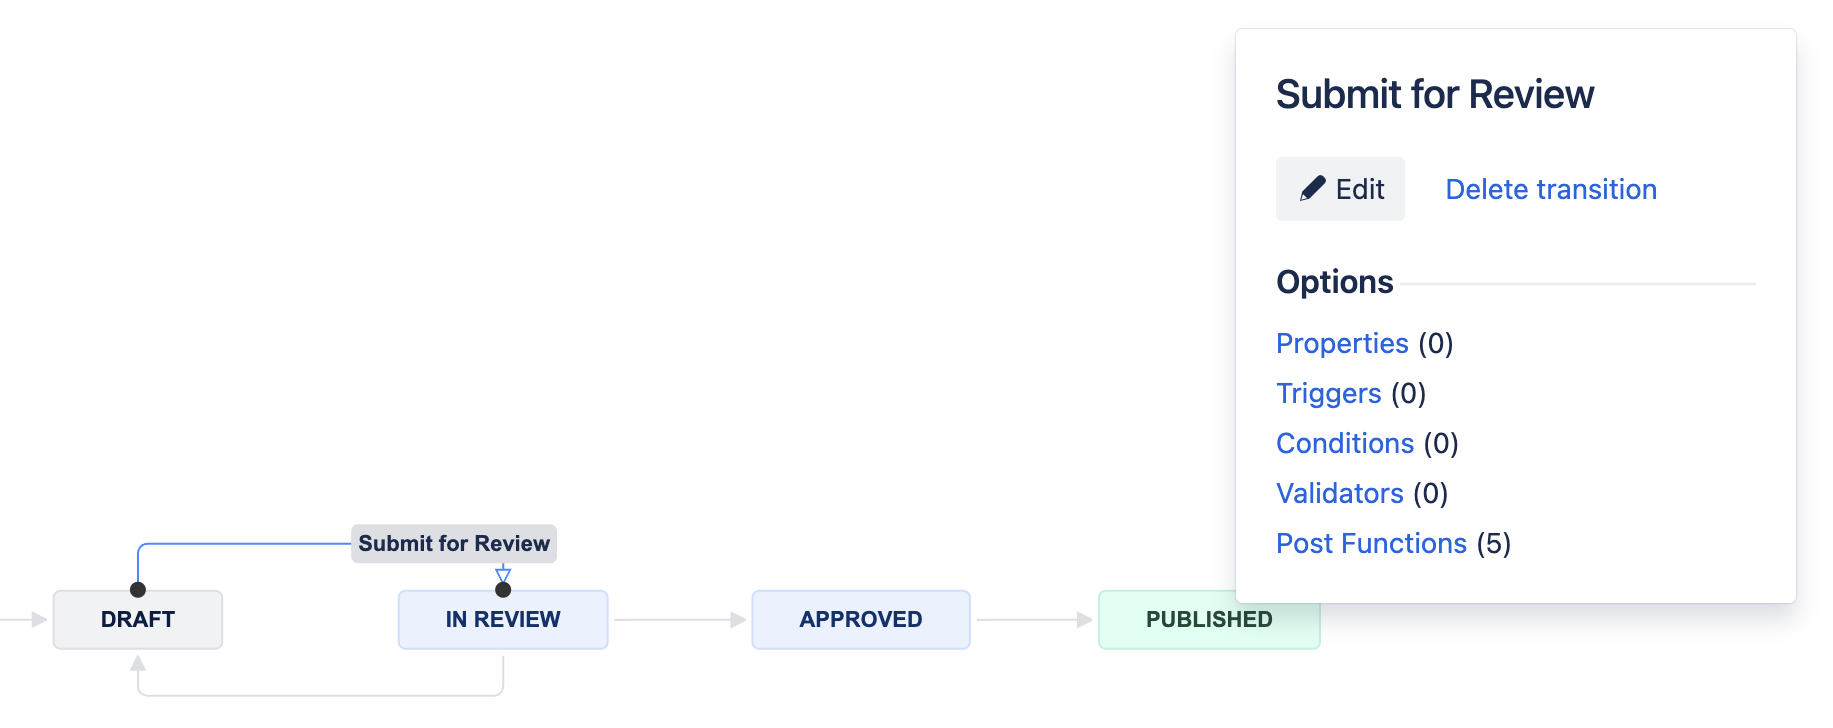
Learn more about workflow transition behaviors here.
Apps to Expand Jira Workflow Capabilities
Jira’s functionality can be further enhanced by a range of apps available on the Atlassian Marketplace. These apps introduce features like advanced automation, custom reporting, and integrations with external tools.
Apps may integrate with the your workflow directly, such as Clockwork for Jira’s use of workflow statuses for no-touch time tracking.
Alternatively, they may piggy-back on Jira automation or transition behaviors as seen in these six ways to integrate checklists with Jira workflows.
Implementing and Iterating on Your Jira Workflow
Remember that creating an effective Jira Workflow is an ongoing process. Start simple and iterate based on feedback from your team. A few tips to keep in mind:
- Keep It Simple at First: Avoid adding unnecessary steps or statuses. A straightforward workflow makes it easier for your team to adapt. Many experts recommend not having more than seven statuses.
- Solicit Team Feedback: Encourage team members to suggest changes. By involving them in the process, you can ensure the workflow meets their needs, and encourage Jira adoption for other projects.
- Iterate for Improvement: As your team becomes more comfortable with Jira, you can incorporate more complex features like automation or transition behaviors.
An optimized Jira Workflow can streamline your processes, make progress more transparent and automate routine work. Mastering workflows and adapting them over time will empower you to drive greater productivity and efficiency in all your projects.
For more insights on making the most of your Jira workflows, visit our articles on Understanding Jira Workflow Transitions and Understanding Jira Issue Statuses.


